The question often arises of how to remove downloads from Android. You can perform deletion using standard gadget functions or using specialized applications.
Often, users use their phone to download a document for viewing or a video file. Then they forget to delete it, and the data continues to be stored on the phone. This will certainly lead to memory overflow and the inability to load applications, games or any other files. In some cases, it is necessary to transfer downloaded files to your computer. To do this, you simply need to know the location of the Downloads folder.
Most Android devices have a special application in their interface with the same name “Downloads”. Just go to it and you will see all the downloaded files.
To remove them you need to:
- Press the function key and then select the Delete menu.
- When selecting files, put a check mark on each of them. If there are too many files, check the box next to “Select all”.
- Confirm deletion.
After this, this folder will be completely cleared.
Some phone models do not have the above application. And how to clear the downloads in this case? Here you will have to use a standard file browser. Almost every modern version of Android has it available. To do this you will need to follow a few simple steps:
If there are important files among the files, it is first recommended to copy them to other directories or to a personal computer.
Clear the "Downloads" directory on Android using third-party software
On some gadgets, the standard file browser is inconvenient because it has a limited list of functions. An alternative is to use third-party file managers, such as Total Commander. Such programs have a functional interface, search by name and easy navigation. The main advantage of the program described above is that already in the main menu you have access to the “Downloads” directory.
If for some reason there is no source folder on the main screen, go to the “Built-in memory” section. After that, click on the magnifying glass icon in the upper right corner. Total Commander supports searching throughout the gadget. Enter the name of the folder (Download) in the line, and then simply click on search. “Total Commander” will display all the results in a couple of seconds.
There are dozens of alternatives in the PlayMarket app store. You can install other file managers to evaluate the convenience and advantages of each.
If none of the methods described above helped you, try using a computer or laptop. Explorer on your PC will help you not only quickly find the required folder, but also delete files that cannot be erased using standard smartphone functions. To empty the Download folder, follow these instructions:
Now you know how to completely empty your Downloads folder. Don't forget to check its contents regularly. In modern models, the built-in memory is from 8 gigabytes, so the accumulated garbage actually does not pose a great danger. In older smartphones, every free megabyte counts. By cleaning out your downloads, you can make room for other important information.
Do not forget that a corresponding notification appears in the notification menu after downloading a file. By clicking on the document, you will automatically be taken to the “Downloads” folder.
Be careful not to delete the folder itself. It is recommended to wash only its contents.
Surely there are completely unnecessary files on your tablet or smartphone that only take up extra space. You can always delete them. You will learn how to do this from our article.
I would like to immediately note that the user can delete any files except system ones, although the latter can also be deleted if you have superuser rights, which in turn can turn the device into a brick. Therefore, if you are not sure whether a particular file can be deleted, it is better not to touch it.
Deleting files is possible not only using the device itself, but also using a computer - when the device is connected to it. Let's go in order.
Deleting files using a file manager
Download the file manager from our website or from Google Play, if you don’t already have it, install it and launch it. When you launch you will see something like this:
Highlighted in red is the device memory and memory card, respectively. Select the partition where you want to delete files. Let's say the deletion will take place from the memory card. Select this section and see a list of folders and files.
To delete a folder, tap on it and hold your finger for about a second until it becomes highlighted, for example:
Then click on the trash can icon at the top of the screen to delete. If you need to delete a file in a folder, go into the folder and do the same trick. File deleted.
Deleting files using your computer
In this case, you need to connect the device to the computer using a cable. After that, open the contents of the device - either the internal memory or the memory card.
Let's talk today about how to stop downloading on Android. It happens that you download something or the applications themselves are updated, and then the connection takes over and... breaks off. The connection appears, but the download remains stuck at the same levels. Neither here nor there. And canceling doesn't work. The loading hangs, it hangs and is annoying. The first and second advice from the search engine do not work. And the loading hangs and is ANNOYING. Once again I forgot where to dig and decided to make a manual for myself, maybe it will be useful to someone else. Let me remind you that other posts on optimizing your phone or tablet can be found in the section.
How to cancel or interrupt a download on Android?
Below are short but very detailed instructions and many screenshots. It works on Android version 4.0.3 and others, but on my smart with version 4.4.2 KitKat there was no need to stop downloading. The download itself was removed, and then resumed when a network signal appeared. An unloaded file in the “Downloads” folder has the status “Queued”. Additional loading does not work in all cases. If your load cannot be removed, then proceed to cleaning it yourself.
Below are 2 options for disabling a download that is “hanging”
. Rather, these are not even options, but paths to one solution. I wrote about how to remove the “Waiting for downloading..” notification in the post
Option one.
1. Go to the menu. Click on the “Applications” item. You can also access this item through the “Settings” (“Options”) icons on the desktop.
2. In the “Applications” menu, go to the “All” tab and look for “Download Manager”. Click.
3. In the download manager, you must click “Erase data”. This will stop the download task.
4. We receive the last warning and agree. Here we are warned that the incompletely downloaded file will be deleted.
5. We get a clean screen without unfinished downloads. The whole thing took 3 minutes.
It is done. The download icon has disappeared, the undownloaded file from the “downloads” folder has disappeared. You can move on with your life in peace.
Option two.
We pull down the top curtain, find the download and with a long tap (click) call up the pop-up form “About the application”.
Click and the download manager will open. There is no need to stop the “Download Manager” itself, we only need to erase the data.
We will receive a warning that the downloaded data will be deleted. The warning is threatening, but this is the standard and only warning for all applications, so the Android authors included there all the dangers that they could foresee when deleting data from any applications. We agree (or disagree).
It's done again. The download icon has disappeared again, the undownloaded file from the “downloads” folder has disappeared, the arrow is not annoying, resources are freed up.
You can see other little tricks about increasing memory and settings for Android in posts and. Good luck, and don't download!
The “Downloads” folder is exactly the place where files that were downloaded by the user from the Internet automatically go. Sometimes, when saving a program or game, the user may be prompted for the address of the directory where the download will take place. If this does not happen, then you can be completely sure that you can find the downloaded file in the “Download” folder.
Where is the Downloads folder located?
Novice PC users often cannot immediately determine the location of this folder. Finding it is quite simple; it is located on drive C in the “Users” folder (in the user folder you need to select the directory with the name of your profile).
More often than not, you don’t even need to search by folder, just open the Explorer window and the “Downloads” folder will be located on the left in the panel with quick access.
Can I delete download files from my Downloads folder?
First you need to determine which file it is. If it is just a download file with which this or that program was installed, then you can delete it without fear. This will not affect the operation of the program in any way.
How to delete an application on Android
But in the case when this is a portable version of the application, that is, a program that simply runs and does not require installation, then this file cannot be deleted, because the program itself will be deleted.
How to delete downloads in a folder
Over time, the “Downloads” folder accumulates quite a lot of different files and becomes very cumbersome. This can greatly slow down the system, as there is little space on the system disk. Therefore, it is periodically necessary to check the folder for unnecessary and unnecessary files and delete them.
This is not difficult to do:
How to erase a flash drive and delete files completely
It will be convenient to store the necessary boot files or portable programs in a specially created folder, for example, on the desktop. So, they will be easily accessible. And at the same time, the “Downloads” folder will be cleared of all unnecessary things, which will make it very easy to navigate the downloaded files.
Part 2: How to Delete Downloads on iPhone
In this part, you can learn several methods to delete downloads on iPhone manually and quickly.
Method 1: Delete Downloads on iPhone One by One
Unlike Android, Apple doesn't allow you to access system folders or create a specific folder to save downloaded files. Instead, content downloaded from a website or computer will be transferred to relevant apps, such as images to the Photos app and PDF files to the iBook app.
Step 1. Launch the iOS Settings app from the home screen, tap your name and go to General > Storage & iCloud Usage and tap Manage Storage in the Storage area.
Step 2. Now you can see how much memory is available on your device and which apps are taking up more space. To remove downloads from an app, tap the app in the list and tap Remove App on the Info screen.
Step 3. After uninstalling the app, go to the App Store and reinstall the app on your iPhone.
Method 2: Delete Downloads on iPhone Professionally
As stated earlier, you cannot delete downloads on iPhone at the same time. From now on, we recommend Apeaksoft iPhone Eraser. This is a professional iPhone removal app with several unique benefits.
1. Delete all downloaded files on your iPhone in one click. 2. Use advanced technology to erase your iOS device completely and quickly. 3. Protect your privacy and information on your iPhone, like various accounts and downloads. 4. Downloads cannot be recovered after iPhone Eraser. 5. Works for iPhone X/8/7/6/6s/5/5s/5c/4 or earlier generations. 6. Compatible with Windows 10/8/7/XP and Mac OS.
How to Delete Downloads on iPhone Permanently
Step 1. Install the best iPhone eraser on your computer
Download and install iPhone Eraser on your computer. Connect your iPhone to your computer using the original USB cable.
Free Download
Note. To avoid data loss, it's best to back up your entire iPhone using iCloud or iTunes before you start deleting downloads.
Step 2. Determine the erasure level
Launch the iPhone eraser app. Once it detects your device, you will be shown three options related to the erase level: Low, Medium, and High. Please read the introductory instructions carefully and select the correct erase level to proceed.
Step 3. Delete downloads in one click
After selecting the erase level, you will be taken to the next screen. If you're ready, click the Start button to begin deleting downloads from your iPhone. Wait for the process to complete, remove your iPhone from your computer, and restart it.
Then restore your iPhone using the backup.
Is it possible to clean out my Downloads folder without harm?
I regularly receive questions regarding the Downloads folder. It is in this folder that all files that you download from the Internet are usually saved, and I talked about this in the article “Where are files saved from the Internet?”
Now I want to answer another question.
The fact is that many novice users doubt whether it is possible to delete files from this folder? After all, program installation files are usually saved in it. Will deleting files from the Downloads folder harm the functionality of programs installed on my computer?
In fact, program installation files are in no way connected with the program itself and therefore you can easily get rid of them. There is only one nuance here - if these are really the installation files of the program, and not its portable version. I also already talked about portable programs in the article “What is the Portable Program.” Such programs do not require installation, which means they are launched by the exact file you downloaded. In this case, you need to move this file to another location on the disk (that is, to another folder).
The “Downloads” folder itself is located in the user profile, which in turn is located on the system drive. This means that the more files are in this folder, the less space remains on the system disk, which can lead to a slowdown of the computer. More about this in the article “Why does my computer slow down?”
That’s why it’s worth regularly cleaning out your “Downloads” folder, moving useful files to other folders on your hard drive and deleting everything no longer needed from it. Also, do not forget to periodically empty the Recycle Bin, since in fact the files in the Recycle Bin still take up space on your hard drive, which means that by emptying the Recycle Bin you can free up additional space.
pcsecrets.ru
How to cancel or interrupt a download on Android
Below are 2 options for disabling a download that is “hanging”. Rather, these are not even options, but paths to one solution. I wrote about how to remove the “Waiting for downloading..” notification in the post How to disable “Waiting for downloading...”
1. Go to the menu. Click on the “Applications” item. You can also access this item through the “Settings” (“Options”) icons on the desktop.
2. In the “Applications” menu, go to the “All” tab and look for “Download Manager”. Click.
3. In the download manager, you must click “Erase data”. This will stop the download task.
4. We receive the last warning and agree. Here we are warned that the incompletely downloaded file will be deleted.
5. We get a clean screen without unfinished downloads. The whole thing took 3 minutes.
It is done. The download icon has disappeared, the undownloaded file from the “downloads” folder has disappeared. You can move on with your life in peace.
We pull down the top curtain, find the download and with a long tap (click) call up the pop-up form “About the application”.
Click and the download manager will open. There is no need to stop the “Download Manager” itself, we only need to erase the data.
It's done again. The download icon has disappeared again, the undownloaded file from the “downloads” folder has disappeared, the arrow is not annoying, resources are freed up.
You can see other little tricks about increasing memory and settings for Android in the posts How to use Android? Part one and How to clear .thumbnails memory on Android. Good luck, and don't download!
(41 ratings, average: 4.83 out of 5) Loading.
How to delete downloads in a folder
Users regularly download something from the global network. In some cases, this is useful data, and in other cases, the files are garbage that people will not use. It only accumulates and takes up extra space on the system disk. Therefore, personal computer owners often ask the following question: “How to delete downloads in a folder?” However, to fully answer it, you need to understand certain details.
Deleting the folder called "Downloads".
The folder called “Downloads” is a place that is used automatically by the system to store files downloaded from the Internet. In some cases, the OS asks in which directory the material from the global network should be saved. In this case, the user will need to specify the path independently. When there is no such request, then a person can be 100% sure that the downloaded information is in this folder.
Deleting downloaded files
First of all, you need to find out where the folder with the downloaded files is located. Finding it will not be difficult for anyone, even for beginners. It is located on drive C. On it you will need to open the “Users” folder, and in it select a directory whose name is the name of the person (your profile). This method is relatively complex. Therefore, it is better to use another option - open Explorer. In the window that appears on the left side at the top, you can easily see the folder you are looking for.
The "Downloads" folder is located on Drive C
Now it’s worth finding out which downloaded files are allowed to be erased without consequences. If you installed any programs with their help, you can get rid of them without any problems. When the file is a portable version of the application, then it is best not to liquidate it, since the program will not be able to run. The removal process itself is performed as follows:
- The folder opens;
- One or more unnecessary files are highlighted;
- Right-click on any of the selected objects;
- In the menu that appears, click the line with the corresponding inscription.
To delete any object, click on the “delete” button.
After these simple operations, unnecessary objects will be automatically moved to the Trash. Next, it is recommended to clean it by first closing the explorer window.
Advice! You need to store portable applications and various download files in a separate place. This will free the “Downloads” folder from all unnecessary things and make it easier to navigate.
xn—-7sbbpvhbl8df8h.xn--p1ai
Part 1: How to Delete Downloads on Android Phone
There is an app called Downloads that saves downloaded APKs, photos and other documents. So, the way to delete downloads on an Android phone is quite simple.
Step 1. Launch the Downloads app from the taskbar. If you can't find the Downloads app on your Android phone, go to the Files or My Files app and find the Downloads folder.
Step 2. Scroll down and find the downloaded files that you want to delete from your device. Select all unwanted downloads and click the Trash icon or the Delete button at the top of the screen.
Step 3. When prompted, click "Delete" to confirm.
Note. If you have moved the downloaded files to other folders, you need to delete them in the target folders.
Sometimes downloads may still mean a lot to you, but you accidentally deleted them from your Android phone. A pity?
Don't panic, but recover deleted files on your Android phone including downloaded documents, photos, etc.
Removing downloads from Android
The question often arises of how to remove downloads from Android. You can perform deletion using standard gadget functions or using specialized applications.
Often, users use their phone to download a document for viewing or a video file. Then they forget to delete it, and the data continues to be stored on the phone. This will certainly lead to memory overflow and the inability to load applications, games or any other files. In some cases, it is necessary to transfer downloaded files to your computer. To do this, you simply need to know the location of the Downloads folder.
We use a standard smartphone application
Most Android devices have a special application in their interface with the same name “Downloads”. Just go to it and you will see all the downloaded files.
To remove them you need to:
- Press the function key and then select the Delete menu.
- When selecting files, put a check mark on each of them. If there are too many files, check the box next to “Select all”.
- Confirm deletion.
After this, this folder will be completely cleared.
Using a Standard Explorer
Some phone models do not have the above application. And how to clear the downloads in this case? Here you will have to use a standard file browser. Almost every modern version of Android has it available. To do this you will need to follow a few simple steps:
If there are important files among the files, it is first recommended to copy them to other directories or to a personal computer.
Clear the "Downloads" directory on Android using third-party software
On some gadgets, the standard file browser is inconvenient because it has a limited list of functions. An alternative is to use third-party file managers, such as Total Commander. Such programs have a functional interface, search by name and easy navigation. The main advantage of the program described above is that already in the main menu you have access to the “Downloads” directory.
If for some reason there is no source folder on the main screen, go to the “Built-in memory” section. After that, click on the magnifying glass icon in the upper right corner. Total Commander supports searching throughout the gadget. Enter the name of the folder (Download) in the line, and then simply click on search. “Total Commander” will display all the results in a couple of seconds.
There are dozens of alternatives in the PlayMarket app store. You can install other file managers to evaluate the convenience and advantages of each.
Removal using a personal computer
If none of the methods described above helped you, try using a computer or laptop. Explorer on your PC will help you not only quickly find the required folder, but also delete files that cannot be erased using standard smartphone functions. To empty the Download folder, follow these instructions:
Now you know how to completely empty your Downloads folder. Don't forget to check its contents regularly. In modern models, the built-in memory is from 8 gigabytes, so the accumulated garbage actually does not pose a great danger. In older smartphones, every free megabyte counts. By cleaning out your downloads, you can make room for other important information.
Do not forget that a corresponding notification appears in the notification menu after downloading a file. By clicking on the document, you will automatically be taken to the “Downloads” folder.
Be careful not to delete the folder itself. It is recommended to wash only its contents.
poandroidam.ru
Part 4: How to Delete Downloads on Mac
Mac also has a Downloads folder. And most Mac apps store downloaded files in their respective downloads folder.
Step 1. Open Finder, press Cmd + Shift + G and enter ~/.
Step 2. Double-click the "Downloads" folder to display all the downloaded files on your Mac computer.
Step 3. Press the Cmd key and select the downloads to delete, then press the "Delete" button on your keyboard to move the unwanted downloads to the Trash.
Step 4. Go to the trash can on the dock and empty it.
Step 5. Finally, open the Safari browser, expand “History” on the top menu bar and select “Clear history and website data.” In the pop-up dialog, select all history and click Clear History to delete your download history in Safari.
Tip: If you use other web browsers, the method for deleting download history is the same as Windows.
How to clear file download history in the Yandex browser - Computer Tricks
Step-by-step instructions on how to delete downloaded files and download history from the Internet through the Yandex browser.
Step by step actions.
1. Go to the “Settings” of the browser, in the “History” menu. Access to the menu is in the upper right corner, to the left of the minimize browser button.
2. Move the cursor to the “History” tab. A new browser://history window will appear in front of you with the contents of the recent history of visited sites.
3. In the upper right corner, find the “Clear history” menu item. Click on it with your mouse.
4. After the transition, you will see clearing the browser history of Yandex Browser
5. To delete information about downloads, check the “Download History” checkbox and select the period of time for which you want to delete data. If you want to delete the entire history, then select “All time”. See screenshot.
To get to the history clearing menu, you can use hotkeys. Press the combination: Ctrl+H; if you need to immediately load, then Ctrl+J.
After setting the settings for deleting data, confirm the operation by clicking the “Clear history” button.
After completing these operations, you will delete from the browser all information about previously downloaded files. However, the downloaded files themselves, music, photos, videos will still remain on the computer if you have not deleted them yourself before.
In order to delete all data (files and folders), you need to go to the browser menu and select “Downloads” or simply press the hotkey combination Ctrl+J. After that you will immediately be taken to the downloads. browser://downloads
To delete photos, music, videos, text documents, presentations, spreadsheets, etc. file manager is used. This is a standard program that is initially installed on any tablet. There are rare exceptions when there is no file manager, then you need to download a third-party manager from Google Play, for example ES Explorer.
To delete a file, you need to know where it is located. In the Android file system there is no such thing as “My Documents”, “My Music”, etc. Everything is different here. To avoid wandering through the file system like a homeless person in the hallways while searching for the file you need, I advised you to use ES Explorer. Thanks to it, all main media files are sorted into libraries.
I will now delete one image, and using this example, you can delete any picture, music or movie from your tablet. So, in the “Libraries” section, I selected Images, clicked on the folder.
After a long press on the required file, a check mark appeared at the top. Now you can click on the “Delete” button.
You can also select several files at the same time by placing a check mark on them. Then all these files can be deleted in one fell swoop.
You can also delete a file directly from the gallery.
If you are viewing photos or videos through the gallery, call up the menu and click “Select files”.
Click on the files you want to delete and click on the trash can icon to delete.
The only thing is that through the gallery you cannot delete a non-multimedia file, for example, a text document, so you will need to use Explorer for this.
If you want to delete a shortcut, widget or folder from the desktop, you need to hold the desired object with your finger and drag it to the top of the display. A cross will appear and the object will turn red. When you release the object, it will be deleted.
If you need to remove the application, it will help you.
Most novice tablet owners who are using devices based on Android OS for the first time very often encounter the problem of deleting unnecessary files. It would seem that the task is quite simple, but not for a beginner. Let's look at the main ways to delete files from a tablet using exclusively pre-installed software, as well as using third-party applications.
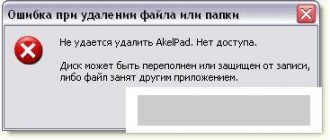
How to delete a file in Android there is no permission to delete – Power of Law
Every user of multifunctional gadgets based on the Android operating system wants to use the full working potential of their device.
At the same time, practice shows that many developers do not allow this to be done on the stock firmware of the device, and users, in order to implement most of their ideas, have to obtain superuser rights.
In this post, we will, in particular, look at the problem of why there is no permission to delete in Android, how to deal with it and why it is necessary to root the gadget.
Causes of uninstallation problems
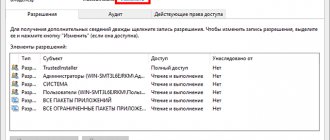
The first reason that can cause the uninstall error is the security score set by the app developers. When creating functional software, many developers try to protect the user from errors during the operation of their program by protecting most of the important files from deletion.
That is, when working with certain programs, you can go into their root folders and delete everything without worrying about removing an important component for the working mode. Therefore, until you get permission 644 on Android, there can be no talk of any deletion.
Another equally pressing reason associated with the inability to delete unnecessary system files or folders is an error that occurs during the use of the deleted files or folders. Often this error occurs when the user moved the application to an SD card, which crashed during operation.
Regular rooting of the gadget will not solve this problem: you will have to use additional programs and utilities that help restore the working parameters of the external storage device, and only then proceed with deletion.
Ways to solve the deletion problem
The first thing that every user of a smartphone or tablet based on the Android operating system needs to do if an uninstall error occurs is to make sure that they have root access on the phone. To do this, you can download free programs such as Root Checker or Terminal Emulator directly from the Play Market.
Having opened the first program, you just need to click on the “Check Route” button, but with the second you will have to strain a little. Terminal Emulator is a program where you will have to enter the “SU” command to test it. If permissions are available, a # or $ sign will appear on your screen.
If checking for superuser rights results in a negative result, you should start opening access. This can be done using the iRoot, Kingoapp, Universal, WeakSauce, KingRoot or Towelroot applications.
Any of these applications will give you the desired access. You can also search online for ways to obtain root access directly on your gadget.
With root rights you can delete almost any file in the system, but what to do when Android does not have permission to delete even after rooting? The solution to this situation is directly related to finding errors on the disks and often leads to the need to flash the device. Therefore, you need to be prepared to take drastic measures to resolve the problem.
Use ES Explorer to remove
Before you start rooting your gadget, pay attention to the fact that many file managers built into the system are not capable of ensuring normal operation of the file system.
One of the programs that is guaranteed to allow you to check the possibility of deleting certain information is ES Explorer.
The effectiveness of this utility has allowed it to gain popularity among millions of users around the world.
This program can be found on almost every device. Moreover, even the free version of the software guarantees practicality and reliability in the process of working with the database.
Deleting files via PC
When faced with uninstallation problems directly under the interface of the Android device, you can try connecting the gadget to your personal computer. Still, you shouldn’t count on successful removal this way.
By means of a PC, not all files of the device are uninstalled, only information that was obtained during operation. Databases important to the system will be saved, and you will see a corresponding message stating that the data cannot be deleted.
The only benefit from connecting your phone or tablet to your PC is that you can format the SD card, resetting all its settings to the original ones, and get rid of errors.
Checking the SD card for damaged areas
If you have transferred application files to an SD card and are no longer able to delete them, it is worth checking your external drive for errors. When there is no permission to delete on an SD card, it is almost always the result of careless use of the drive, and this error is the easiest to deal with.
The problem is resolved by full formatting. To do this, just connect the card to your computer and start the process.
Also, to avoid reoccurring problems with deletion, you can change the cache on the card. For this purpose, the SD Speed Increase application was created, which can be downloaded from the Play Market. If formatting the card doesn't help, consider replacing it.
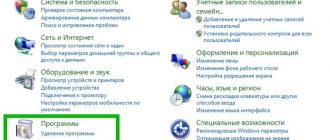
The most popular methods of checking SD cards for errors, in turn, include checking by connecting to a PC. To do this, you need to connect the SD card to the computer, find it in Explorer, right-click on the device shortcut and select “Properties”.
Next, you just have to find the “Service” section and click on the active button “Check the disk for errors.” You wait until the end and get acquainted with the result.
If you want to check the SD card for errors using Android, you will need to download additional utilities.
The SD Tools program, which can be downloaded for free directly from the store, is excellent for performing this task. It not only searches for errors, but also provides the user with a complete list of technical information on the memory card, including read and write speed parameters.
Flashing Android
Often, uninstallation problems are directly related to the operating system. That is, the user of the device, even if he has superuser rights, will not be able to delete it until he updates the firmware in his gadget.
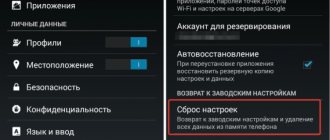
You can reset the device to factory settings, perform Wipe Cash/Wipe Data, integrate a large number of programs from external sources, but this, unfortunately, will not lead to anything.
Source: https://silprav.ru/kak-udalit-fajl-v-androide-net-razreshenija-na-udalenie.html
How to delete files from your tablet
The first method is the easiest to learn and does not require installing any other applications or using anything other than the programs that are already on the tablet. If you just need to remove shortcuts to programs or files, then just hold down and do not release this shortcut until the trash can symbol appears at the top, then just drag the shortcut there and it will be removed from the main screen. However, the application itself is not deleted. In order to remove a program from your tablet, you need to go to the settings, then select the “Applications” category, there you will see a list of programs that are currently installed on your device. Next, simply select the program that you no longer need and click on the “uninstall” button in the window that appears. In some cases, a window may appear notifying you that the application is currently in use, then you must select the “force stop” button.
In order to delete files on your Android tablet that are not programs and applications, for example, text documents, pictures or videos, you can use a special program preinstalled on your tablet - File Manager. Oddly enough, when first getting acquainted with the device, few people pay attention to it, but it is with its help that you can delete, copy or move files, as well as perform any other operations with them.
You can also use the Google Play service to delete files from your tablet. Here you can download useful software that will help solve this problem even if the previous methods did not help you with this. Some programs can also be used to completely delete files, which is almost impossible to achieve with standard tools. Such applications “clean up” all traces of the existence of files on your device, in particular, cache, saved copies, and so on, which allows you to avoid system instability in the future, as well as clear up additional disk space. Here you can also go to the additional menu “My Applications”, where a list of programs that you have installed on your mobile device will be presented; by selecting the unnecessary one, you can easily remove it.
Using a Standard Explorer
Some phone models do not have the above application. And how to clear the downloads in this case? Here you will have to use a standard file browser. Almost every modern version of Android has it available. To do this you will need to follow a few simple steps:
- Go to the list of gadget applications. Look for "File Browser" or "All Files" (the name may vary depending on the model).
- Select the “Built-in memory” line.
- Scroll through the list of folders until you find the “Downloads” (or Download) directory. Enter it.
- Select all contents and then delete.
If there are important files among the files, it is first recommended to copy them to other directories or to a personal computer.
How to recover deleted files on a tablet
Quite often it happens that along with unnecessary files, those that should have been left on the tablet are also deleted. In such cases, it is quite difficult to correct the situation using only the tablet and the software installed on it. in this situation, you will connect your device to a desktop computer, and then download special utilities designed to solve such problems, for example, Magic Uneraser. These programs are usually multifunctional and are useful for both deleting and restoring files. Once launched, the application will scan your device and show you which files deleted from your tablet can be recovered. Applications of this kind have an intuitive interface, which allows even a beginner to quickly get used to them.
So let's get started!
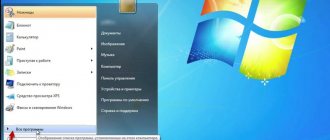
Standard way to remove an application from Android OS
1. Open “Settings” (shortcut on the desktop in the form of a gear).
2. Select Applications from the menu.
3. In the list, tap (touch with your finger) if your device is equipped with a touch screen, or click the cursor on the program you are going to delete.
4. In the functional menu that opens, activate the “Delete” option.
5. Confirm your intention to get rid of the unnecessary application by clicking on the “OK” system request.
That's all you need to do to remove the program from the system in the standard way.
How to find downloads in the browser on Android
We noted above that not all files that you download to your device end up in the Downloads folder. Sometimes it happens that the file is downloaded to the browser's memory.
- If you have Google Chrome, launch it and go to the context menu by clicking on the three vertical dots in the upper right corner;
- Open the “Downloaded files” section and, having found unnecessary components, remove them from memory.
As a rule, only small components, for example, saved HTML pages, get into the memory of a web browser, but over time there are so many of them that they can occupy hundreds of megabytes.
Subscribe to our channel in Yandex.Zen so as not to miss all the most interesting things.
Removing applications from Android OS using the Uninstaller utility
Uninstaller is an effective tool for removing unnecessary programs from the system. It has a clear, simple interface. Indispensable when you need to quickly remove a large number of applications. You can download Uninstaller for free on Google Play. The Russian version of the program is called “Delete”.
1. Install Uninstaller on your system and then run it.
2. A panel will open with a catalog of installed games and applications. Select the program/programs that you no longer need (their names should change color).
3. Tap on the option at the top on the green background “Delete selected applications”. Pay attention to the quantity indicated in brackets. Before activating the uninstallation procedure, review the selected applications again: make sure that there are no useful programs among them.
Uninstall via Safe Mode
Safe mode can be useful for solving various system problems. In particular, through it you can quickly delete an application that is not deleted in normal Android operation.
- Enter Safe Mode.
- Go to Settings > Applications.
- Select a program by clicking on the line with its name.
- Click on the Delete button.
- Confirm the action.
How to delete files with the extension .apk?
Quite often, an incredible number of archived APK (Android Package) executable files accumulate in the Download folder, which the user once downloaded from the Internet. After downloading, they remain in the folder as dead weight, taking up valuable megabytes of device memory.
You can get rid of them using the system delete function.
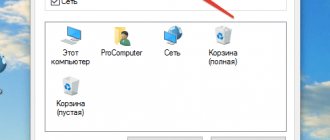
- Go to “Files” (icon on the desktop).
- Find the “Download” folder with downloaded apk files (usually located in the sdcard directory) or some other folder that you want to “clean”. Open it and check the boxes next to the applications to be removed.
- Activate the “Actions” menu (click/tap on the selected files) and select the “Delete selected” command.
Removing applications using SD-Maid cleaner
SD-Maid Pro (free version of SD-Maid) is a multifunctional utility for cleaning the Android OS file system. It can remove not only the installed program, but also duplicates, empty and unnecessary (used) files.
You can remove installed applications from the OS using the free version of the utility - SD-Maid (without Pro!). Download it on Google Play.
- Launch SD-Maid.
- Select “Manager” from the menu.
- Select the program you want to remove from the system.
- In the submenu that opens, tap “Delete apps and data.”
Regularly use these simple methods to clean up the software in the Android OS shell. Because, as you know, cleanliness is the key to health. Even in relation to electronic gadgets. And everything will be OK!
Downloads is a folder where all files that are downloaded to your computer from the Internet are automatically saved. In some cases, the user is asked where to save the program or file. If this request was not made, then the file or program automatically ends up in the downloads, which means that you need to look for it there.
Method 1: Standard browser
We delete temporary files from the standard browser. Open the browser pre-installed on your phone and go to settings (open the menu at the top right).
In the settings, look for the “Clear data” option (clear cache) and select which files you want to delete.
- cache – saved content from the Internet in the phone’s memory (pictures, videos, scripts, forms);
- saved passwords – passwords on websites (I don’t recommend deleting them);
- form data (when you fill out any forms on the site, your data is remembered) – delete;
- cookies – temporary files from websites – also delete;
- geodata (when sites collect information about your location) – delete;
- history – clear the history of previously visited sites.
Delete all temporary files except saved passwords.
Where is the Downloads folder located?
Often you may encounter the fact that users cannot immediately figure out where the downloads are located. In fact, finding this folder is easy. The folder location is the system drive. As a rule, this drive is called C. You need to go to the “Users” folder and there will already be the very folder that is so necessary. But you don’t have to go deeper into searching the disks. In most cases, such a folder is easy to find if you just go to Explorer. To the left of the Quick Access Toolbar you can see the Downloads folder.
Can I delete download files from my Downloads folder?
Before deleting something, determine what kind of file it is. If this file is a regular boot file that helped install the program, then you can delete it without fear or worry. The program will work as usual. If this is the application version, i.e. the program itself, which runs without installation, then this file cannot be deleted, because the program will be deleted and you will not be able to use it.
Over time, a huge number of files that are not needed accumulate in the “Downloads” folder. The folder becomes cumbersome, work begins to slow down, because... space on the system disk is taken away. Who will like the braking system? That's right - no one. Therefore, it is necessary from time to time to clean the folder from unnecessary files that are no longer useful. Such files can be safely deleted.
Deleting downloads is very easy. You need to open the "Downloads" folder. Here we select the file (one or several, depending on you) that needs to be deleted. If these are several files, then you need to select them by holding the Ctrl key. Now click the right mouse button on the selected object (if there are several of them, then one of them). And now you need to select “Delete”. After this, all deleted files will be moved to the trash. Close Explorer and go to the Trash.
In order not to accidentally delete the necessary files and portable programs, you need to create a special folder where you will put them. It is best to place the folder on the desktop, because... they will always be at hand.
Surely on your tablet or smartphone there are completely unnecessary files that only take up extra space. You can always delete them. You will learn how to do this from our article.
I would like to immediately note that the user can delete any files except system ones, although the latter can also be deleted if you have superuser rights, which in turn can turn the device into a brick. Therefore, if you are not sure whether a particular file can be deleted, it is better not to touch it.
Deleting files is possible not only using the device itself, but also using a computer - when the device is connected to it. Let's go in order.
Deleting files using a file manager
Download the file manager from our website or from Google Play, if you don’t already have it, install it and launch it. When you launch you will see something like this:
Highlighted in red is the device memory and memory card, respectively. Select the partition where you want to delete files. Let's say the deletion will take place from the memory card. Select this section and see a list of folders and files.
To delete a folder, tap on it and hold your finger for about a second until it becomes highlighted, for example:
Then click on the trash can icon at the top of the screen to delete. If you need to delete a file in a folder, go into the folder and do the same trick. File deleted.
There is no permission to delete in Android. How to get permission?
Multifunctional gadgets that run on the Android operating system are extremely popular today. Such devices are convenient not only for entertainment or communication with friends and family, but also for work.
As a rule, all modern devices have additional memory cards installed - SD Card. It is often with such storage media that problems arise. At the same time, the smartphone system itself has several levels of protection.
As a rule, users encounter difficulties when they need to delete a particular file. The system displays a message stating that Android does not have permission to delete.
This usually means that the user does not have the appropriate rights. But if on a regular PC almost everyone knows how to get administrator access, then with a phone or tablet it can be difficult.
Therefore, we will take a closer look at what to do if there is no permission to delete on Android.
The most common causes of difficulties
Often, certain applications begin to work incorrectly due to user actions. If the user inadvertently deletes the required file, this will lead to a failure. Therefore, some developers are simply trying to prevent such situations.
They increase the level of file security. Therefore, they cannot be simply removed. The user must have administrator rights. In this case, permission 644 is required to delete files on Android.
Otherwise, you can forget about such manipulations with system files.
There is another mistake that occurs very often. The problem is that the user initially installed the application in the root folder of the phone, and then transferred it to the SD Card. Such media often malfunctions, which prevents the subsequent deletion of files.
In the first case, there are several methods to solve the problem. But if it’s all about how the memory card works, then you’ll have to use third-party applications. You can find them in large quantities on Google Play.
There is no permission to delete in Android from SD Card: checking for administrator rights
There are several utilities that can help you check your access level. For example, you can download the Root Checker program. After installing it, just go to the application and select “Check Root”. Usually after this you can understand whether the owner of the gadget has the necessary permissions.
You can also download the Terminal Emulator program. In this case, a little more manipulation will be required. To determine user rights, you need to type the short command SU. If the user has the necessary rights, the # symbol will appear on the screen. If they are missing, the user will see a dollar icon.
If you manage to find out that the user does not have administrator rights, then you need to solve the problem using other utilities.
Programs for providing access
In this case, you can also find a huge number of utilities on Google Play. For example, iRoot or WeakSauce will do. All these programs work on the same principle. Just go to the application after installing it and activate it.
Having received the so-called root rights, you can delete any folders or files. There shouldn't be any problems in the future. But sometimes, even after such manipulations, the user sees a message that there is no permission to delete on Android. What to do in this situation? In this case, you need to resort to drastic measures. Let's take a closer look at them.
Using ES Explorer
If there is no permission to delete from an SD Card on Android, then experts recommend first of all using the built-in solutions of this operating system. Third-party programs are not always able to make changes to root folders. Therefore, it is most convenient to use the ES conductor.
All you need to do is find the program on your mobile device. It will display all folders and files. They can usually be removed without difficulty through the ES guide. But sometimes even in this case such manipulations remain impossible. Then you should use another method.
Uninstalling programs via computer
It’s worth noting right away that in this way you can only delete those files that were installed while using the gadget. This means that if we are talking about system, protected files that were already present on the device at the time of purchase, then it will not be possible to get rid of them using this method.
To uninstall programs via a PC, just use a USB cable and connect the gadget to the computer. The next step is to go to the device folder via PC and try to delete files manually.
Separately, you can find the SD Card section and see which files may require uninstallation. But not always, after connecting the gadget to the PC, the user receives the appropriate access.
Therefore, you will have to perform a few more manipulations.
How to get permission to delete on Android
This method will allow you not only to display the gadget’s folders on your PC, but also to delete unnecessary files directly on the device itself. In this case, it's about gaining developer access and enabling USB debugging.
To do this, you need to find the “About phone” (or about tablet) item in the settings. After this, you need to find the line “Build number” and click on it at least 5-7 times.
After this, the “Developer Options” item should appear in the general settings of the device. This means that the user has received the required access level.
Now you can connect the gadget to your PC or uninstall programs and folders that previously could not be removed.
Checking and fixing SD Card errors
As mentioned earlier, if there is no permission to delete in Android, then perhaps the problem lies in the additional memory card. Therefore, it is worth checking if the external drive is damaged. Users often use such tiny devices very carelessly, which leads to barely visible damage. Sometimes the problem lies in internal errors.
In this case, it is worth carrying out the procedure of completely formatting the drive. To do this, you need to connect the card to a PC via a special adapter and perform this procedure. Just right-click and select “Format”.
To prevent such errors from occurring in the future, it is worth making changes to the map cache settings. The easiest way to do this is to download an application on Goggle Play called SD Speed Increase.
There is another way to check the map for possible errors. To do this, you need to reconnect it to the PC and, right-clicking, select the “Properties” line. In them you will need to go to the “Service” section, in which you just need to activate the button responsible for checking disks for possible errors.
Some also install the SD Tools utility. It is installed directly on the gadget, so no connection to a PC is required. This utility independently finds errors on the map and provides all the information on how to solve them.
System flashing
If nothing helps and there is still no permission to delete on Android, then the problem may be in the operating system of the device itself. This means that even if you have developer rights, you may not be able to uninstall some files.
In this case, you will first have to return the device to factory settings, and then try to reflash it. But you need to understand that this method can lead to serious failures, especially if the user has never performed such manipulations before.
Source: https://FB.ru/article/467211/net-razresheniya-na-udalenie-v-androide-kak-poluchit-razreshenie