System Protection creates restore points that save system settings and previous versions of files. Using System Restore, you can fix problems in Windows, for example, in case of problems due to the installation of programs, codecs and drivers, failure in file associations, and incorrect operation after cleaning the registry.
[+] Today on the program
- Windows Recovery Tools Comparison Chart
- New system protection and recovery options
- Why you don't need to disable system protection
- How system protection works
- Service and protected file types
- Default system protection state
- How much space is initially allocated for shadow copies?
- Enabling protection and creating a point from PowerShell
- Automatic creation of points by the system
- Subtleties of the scheduled task
- Create your own scheduled task
New system protection and recovery options
In Windows 7, system protection has been improved. The most significant improvements are listed in the table below.
| New opportunity | Description |
| Setting up disk space | In Windows 7, the graphical interface again allows you to set the percentage of disk space that is allocated to protect the system. This feature existed in Windows XP, but disappeared in Windows Vista, although it could be done from the command line. |
| Fine-tuning protection | You can configure protection for previous versions of files together with system settings or separately. |
| Find affected programs | For each restore point, you can view a list of programs and drivers that will be affected by the rollback. Obviously, such programs may not work properly after a system restore. This way, you can know in advance which programs may need to be reinstalled after a system restore. |
| Using a System Backup Image | Windows 7's backup capabilities allow you to create a complete image of the operating system. If such an image exists, it can be used for recovery as one of the points. |
These and other possibilities for protecting and restoring the system will be discussed later in the article. However, first I would like to address one important issue. Some users undeservedly disable system protection almost as the first thing they do. I want to talk first about why it doesn’t make sense to do this in Windows.
Enabling or disabling system recovery
To enable the function, you must perform a number of actions:
- Open computer properties : click on “My Computer” or “Computer”, depending on the version of Windows, right-click, select “Properties”;
- Go to additional parameters by clicking on the corresponding item on the left;
- Click on the “ System Protection ” tab. We look through the list of disks connected to the computer. To the right of the drive names it is written whether the creation of backup points is enabled or disabled. Pay special attention to the system local disk;
- To configure backup settings, in the window from the previous item, click on “ Configure ”;
- Here you need to check the box next to “ Restore system settings and previous versions of files .” Use the slider below to select the amount of memory that you can allocate for storing Windows backup recovery files. Usually 5% of the disk volume is enough. But here everything is purely individual and depends on many factors, the key of which is the number of installed programs and their volume.
- If suddenly you accidentally close the window, we do the same thing as we did to turn it on until the last step;
- In the list with possible backup options, click on “ Disable system protection ”
Windows 7 was used to explain the algorithm, but the sequence of actions will be the same for all OS versions, only the names of some items are different.
However, the error “System Restore has been disabled by the administrator” may appear already at the stage of viewing protection properties.
Why you don't need to disable system protection
There is an opinion that by disabling System Restore, you can increase Windows performance. As a rule, saving of RAM (by disabling the service) and disk space is cited as an argument. In fact, these arguments are already almost 10 years old, if you count from the release of Windows XP, so applying them to modern hardware is simply pointless. Do you still have 256 MB of memory and a 40 GB hard drive?
Disabling one service will not affect Windows performance in any way - you simply won’t notice it, just as it was not noticeable in previous Windows operating systems. Disk space - yes, it is saved, but in the era of terabyte hard drives on which tens and hundreds of gigabytes of media files are stored, talking about saving on a couple of gigabytes of files intended for system recovery is simply not serious. Even if your hard drive has a relatively modest capacity, you can flexibly configure the space allocated to system protection, which will be discussed later in the article.
Using System Restore, you can fix Windows, for example, in the case of:
- problems due to the installation of updates, programs, codecs and drivers
- file association failure
- incorrect operation after cleaning the registry
- problems loading the system
Loading problems are perhaps the most annoying for users. In modern Windows, they can be overcome in two ways from the Windows RE recovery environment. It has a special boot recovery feature and also allows you to restore the system back to a checkpoint, which can also help boot the system. At the same time, now you don’t even need an installation disk - you can use the Windows RE environment pre-installed on your hard drive or boot into it using a pre-created recovery disk.
In addition, Windows 7 has new recovery options, which are described below. Thus, by disabling system recovery, you do not gain anything, but on the contrary, you lose a convenient tool that allows you to restore not only the system, but also peace of mind.
How system protection works
System protection and recovery are implemented using the Volume Shadow Copy Service.
Service and protected files
Volume Shadow Copy Service tracks changes across the entire partition, which is a big change from Windows XP, where System Restore only tracked a key set of system and application files.
However, user files (except for these types) are not included in system restore points, so returning to a previous point will not result in the loss of documents and other files in your profile. However, Volume Shadow Copy Service monitors changes to user files and you can restore them to previous versions.
Default system protection state
In Windows 7, 8 and 8.1, system protection is enabled immediately after the system is installed. In Windows 10, the behavior is described by KB3209726, and with my clarifications the situation is as follows:
- protection is always disabled initially, whether upgrading from Windows 7/8.1 or a clean installation
- protection is automatically enabled after installing any MSI package or Windows updates, but only on a partition larger than 128GB
How much space is initially allocated for shadow copies?
The amount of disk space allocated for the volume shadow copy service (including storage of recovery points) depends on the capacity of the hard drive, or partition, if the drive is divided into several partitions. If the partition is less than 64 GB, the Volume Shadow Copy service is allocated 3%. If the partition is larger than 64 GB, previous versions of files and system restore points will be allocated 5% of the disk space or 10 GB, whichever is less.
When the disk space allocated for the Volume Shadow Copy service runs out, old recovery points are deleted and replaced with new ones. Windows has the ability to manage the space allocated for system protection, and this will be discussed further.
Your home page
Setting up system recovery in Windows 7 and solving problems with setting up protection System protection in Windows 7 is responsible for creating restore points and “returning” the system to the state of a previously saved point. Depending on the settings of the mechanism, either only files or files and system settings are protected.
Learn more about how to enable or disable system protection, as well as about frequently encountered problems related to setting up system protection. How to enable system protection in Windows 7 Click Start, right-click Computer and select Properties. In the window that opens, click on “System Protection”: Fig. 1: Managing system protection in Windows 7
A window will open with a list of partitions found in the system. Opposite the partition it is written whether partition protection is currently enabled or disabled: Fig. 2: Setting up system protection in Windows 7
By default, protection is always enabled for the partition on which Windows 7 is installed. For other partitions, protection is disabled. Select the section you are interested in and click “Configure.” A window will open: Fig. 3: Setting up system protection in Windows 7
The first two points include system protection; from their name it is clear what level of protection they provide (it is always recommended to select the first point). The “Disable system protection” item, as the name implies, disables protection. Remember that immediately after disabling protection and saving the settings, all previously created recovery points for this partition will be permanently deleted! Protection cannot be enabled for partitions with the FAT or FAT32 file system (as these systems do not support data shadow copying). That’s it, save the settings and, if you have enabled protection for the new partition, you can create the first system restore point by clicking on the “Create” button
Solving problems with setting up System Restore in Windows 7 The most common problems that arise when setting up System Restore and how to solve them. System Restore does not work: the “System Restore” tab is missing in the computer properties or errors occur when trying to go to the tab. Most likely we are dealing with a damaged system. This also happens when installing Windows 7 on top of another operating system. Try the following. You must be running as a user with Administrator rights in Windows 7. Check the status of the Copy Provider service. This service must be started or set to Manual. As Administrator, launch a command prompt and type sfc /scannow. This command will check for errors in Windows 7 system files. System protection is disabled, the “Settings” and “Create” buttons are not active: Fig. 4: Errors during system recovery
In addition to steps from step 1, try the following: As an administrator, launch a command prompt and execute “gpedit.msc”. In the window that opens, go to “Computer Configuration -> Administrative Templates -> System -> System Restore”: Fig. 5: Errors during system restore in Windows 7
Both items must have the status “Not set”
Configuring system protection manually
There are various ways to access system protection settings. You can:
- open Control Panel - System - System Protection
- Computer icon on the Start , desktop, or File Explorer and select Properties , then click System Protection
- in the command line or in the Run (WIN+R) enter rundll32.exe shell32.dll,Control_RunDLL sysdm.cpl,,4
From this window you can:
- run system restore
- configure system protection and remove checkpoints
- create a restore point
New to Windows Vista is the Configure , which opens system recovery options for the drive.
This window contains two new opportunities and one well-forgotten old one. You can:
- configure protection of previous versions of files together with system settings or separately (only in Windows 7, because in newer operating systems two radio buttons only switch the protection state)
- configure the disk space allocated for storing recovery points (graphically configured in the same way as in Windows XP, but uses shadow copy functions as in Windows Vista)
- delete restore points
Let's take a closer look at these possibilities.
Recovery options
The ability to protect previous versions of files separately, without protecting system settings, is only available in Windows 7. If you select this option, the effectiveness of system recovery will be slightly reduced. Therefore, I recommend leaving the default value.
The ability to restore previous versions of files first appeared in Windows Vista. Moreover, it can not be considered separately, but in combination with backup using Windows 7. The fact is that different versions of files are saved not only using the volume shadow copy service, but also when using Windows archiving. In the file properties on the Previous Versions , indicate the location: Restore Point or Archive .
In addition to previous versions of individual files, Volume Shadow Copy Service allows you to restore previous versions of folders and their contents. More information about previous versions is described in the article Restoring data from backups and shadow copies in Windows 7.
Disk space usage
At first glance, Windows 7 simply brought back the ability to manage the disk space allocated to system recovery, which existed in Windows XP but disappeared in Windows Vista.
However, in Windows 7, the user interface familiar from Windows XP controls technology that came from Microsoft server operating systems and was first introduced in the Windows Vista client system. In reality, you control the disk space allocated for shadow copy storage. This feature was also available in Windows Vista, but was implemented only on the command line using the VSSAdmin . In Windows 7 and later, this command is also available. For example, to view the disk space occupied by shadow copies, you can run the following command as an administrator:
VSSAdmin list ShadowStorage
The result will be something like this:
You can set the maximum amount of disk space for shadow copies from the command line:
VSSAdmin Resize ShadowStorage /For=C: /On=C: /MaxSize=5GB
Deleting restore points
Deleting all restore points is a new feature in Windows 7. In Windows XP and Vista, deleting absolutely all restore points was only possible by disabling system protection. (The ability to delete all points except the last one is available in all Windows operating systems when running disk cleanup with administrator rights.) Now you can delete all points without disabling system protection. This deletes not only the recovery points, but also the entire contents of the shadow copy storage, so previous versions of the files will not be available.
However, even after deleting all the points, you can use System Restore to return to the point that the system backup image is used as. This is a new feature in Windows 7, and you will learn about it below in the story about the system recovery process, which has also undergone changes for the better.
Enabling System Restore using Registry Editor
This method - eliminating the message that System Restore is disabled - is suitable for all editions of Windows, unlike the next one, which involves using an edition not “lower” than Professional (but may be easier for some users).
The steps to fix the problem will be as follows:
- Launch Registry Editor. To do this, you can press the Win+R keys on your keyboard, type regedit and press Enter.
- In the Registry Editor, go to (folders on the left) HKEY_LOCAL_MACHINE SOFTWARE Policies Microsoft Windows NT SystemRestore
- Either delete this entire section by right-clicking on it and selecting “Delete”, or follow step 4.
- Change the values of the DisableConfig and DisableSR parameters from 1 to 0 by double-clicking on each of them and specifying a new value (note: some of these parameters may not be present, do not assign a value to this).
Ready. Now, if you go back to your system protection settings, you should not see any messages stating that Windows Restore is disabled, and the restore points will work as expected.
Run System Restore manually
System Restore is an important feature of Windows. Therefore, it is not surprising that there are many ways to launch it:
- In the Start menu - Search, type Recovery and click System Restore
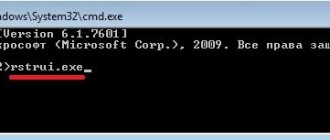
- in the Start menu - Search or in the Run (WIN + R) enter rstrui and press Enter
- In the Control Panel item Backup and Restore, click Restore system settings or computer at the bottom, and then click Run System Restore
- open Control Panel - System - System Protection and click System Restore
- In addition, system recovery can be launched from Windows RE
Regardless of how you run System Restore, you will be prompted to select a checkpoint.
You can return to the last created point or select any other one from the available ones.
The figure above highlights the new system recovery options. If you have a system backup image, you can use it as a restore point. To see this point, check the Show other restore points .
In addition, you can now find out which programs will be affected by the changes during recovery. Select a restore point and click the Search for affected programs .
However, you can search for affected programs without opening the restore point selection window. Before starting the repair operation, Windows displays a summary window where a Search for affected programs is also available.
All you have to do is click Finish , and the system recovery process will start.
System rollback or restore
Let's perform a system rollback to the moment the restore point was created.
To do this you need:
- Open the main Start menu and type system restore in the search bar
Calling System Restore
- Select System Restore
- Click Next > and select the required restore point
- If we don’t know which point to choose, select the latest one and click Next >. If the problem is not solved, select the next one, etc.
- Click Next >
Restore Point Confirmation
- Click Finish and receive a warning
Computer Recovery System Warning
- Click Yes. The system will be restored. The computer will restart and you will see the following message
- Click Close
System restore completed successfully.
Cancel System Restore
You can cancel the last system restore if you accidentally selected the wrong point, or the restore did not bring the desired results. This is possible because Windows creates a checkpoint before restoring. To cancel System Restore, run it again.
The system will prompt you to cancel System Restore or select a different restore point.
System Restore has been disabled by the administrator
Some Windows 10, 8, and Windows 7 users may encounter a message that System Restore has been disabled by the system administrator when they try to manually create a System Restore point or run a restore. Also, when it comes to setting up recovery points, you can see two more messages in the system protection settings window - that the creation of recovery points is disabled, as well as their configuration.
This instruction will tell you step by step how to enable recovery points (or rather, the ability to create, configure and use them) in Windows 10, 8 and Windows 7. Detailed instructions on this topic may also be useful: Windows 10 Restore Points.
Usually, the problem “System restore has been disabled by the administrator” is not caused by any of your or third-party actions, but by the work of programs and tweaks, for example, programs for automatically configuring optimal parameters for the operation of solid-state drives in Windows, for example, SSD Mini Tweaker, can do this (on see this topic separately: How to set up an SSD for Windows 10).
Automation of enabling protection, setting it up and creating points
You can create a restore point manually at any time. This section discusses various aspects of automatic point generation.
Enabling protection and creating a point from PowerShell
This can be useful for automation in Windows 10 on disks smaller than 120GB. Run the commands below in PowerShell as an administrator. The first enables system protection, the second allocates 5% of the disk, and the third creates a point.
Enable-Computerrestore -drive "C:\" VSSAdmin -% Resize ShadowStorage /For=C: /On=C: /MaxSize=5% Checkpoint-Computer -Description 'My point'
See also running PowerShell scripts.
Automatic creation of points by the system
Restore points are created automatically when:
- installing applications and drivers (if their installer is compatible with system protection)
- installing Windows Updates
- restoring the system to one of the previous points (this makes it possible to undo changes if, for example, the wrong point was accidentally selected)
In Windows 8, an additional nuance has appeared - the system does not create a new point if the old one was created within 24 hours (with the exception of manual creation in the Control Panel). Below I will show how to get around this limitation.
Subtleties of the scheduled task
Restore points are also created on a schedule. The regularity of their creation is monitored by the Task Scheduler , which is a snap-in of the Microsoft Management Console (MMC). The task for checking and creating recovery points is located in the Task Scheduler Library - Microsoft - Windows - SystemRestore . The task is launched daily at 00:00 and when the computer is turned on.
Despite the external similarity of this task to what was in Windows Vista, there is a significant difference in Windows 7. In Windows Vista, the job checked to see if any points had been created within the last 24 hours, and if there were none, it created a new point. In Windows 7, this interval is extended to 7 days.
In practice, this means that if applications, drivers and Windows updates are not installed daily, restore points are created once a week. This allows you to use disk space more efficiently and provide a wider window of time for system recovery.
Create your own scheduled task
Some people choose to create points more often than the system allows in order to store work files in shadow copies, using this as a short-term backup. You can automate the creation of points using PowerShell. One command is enough:
powershell -ExecutionPolicy Bypass -noprofile -WindowStyle Hidden -command Checkpoint-Computer -Description 'Your point description is here'
There is also a VBS script.
'Background creation of a recovery point 'For interactive creation, uncomment the highlighted lines '—————————————————— If WScript.Arguments.Count = 0 Then Set oShell = CreateObject("Shell.Application" ) oShell.ShellExecute "wscript.exe", """" & WScript.ScriptFullName & """ Run", , "runas", 1 Else Set oWshShell = WScript.CreateObject("WScript.Shell") 'oWshShell.Popup " Creating a SystemRestore point. Please wait.", 2, "System Restore", 0 swinmgmts = "winmgmts:\\.\root\default:Systemrestore" GetObject(swinmgmts).CreateRestorePoint "Scheduled Restore Point", 0, 100 'MsgBox "System Restore Point created ", 0, "System Restore" End If
In the scheduler, the easiest way to do this is to run the wscript , specifying the full path to the VBS file as an argument.
Note
.
On Windows 8 and later, to bypass the 24-hour limit, create a DWORD value named SystemRestorePointCreationFrequency with a value of 0 under
HKEY_LOCAL_MACHINE\SOFTWARE\Microsoft\Windows NT\CurrentVersion\SystemRestore
1] Enable system protection via PowerShell
In this solution, assuming you can boot Windows successfully, there is a simple PowerShell command that can return the system protection feature for the drive you want to recover. After this, you can go to System Recovery settings and check if you can enable System Protection for the drive where Windows is installed.
Do the following:
- Press the Windows keys + X to open the Power User menu, and then press the A key on your keyboard to launch PowerShell in Administrator or Elevated mode.
- In the PowerShell console, type the following commands and press ENTER after each line.
enable-computerrestore -drive “c:\” vssadmin resize shadowstorage /on=c: /for=c: /maxsize=5% checkpoint-computer -description “Done” The
commands will take a couple of seconds to complete.
- Restart your computer.
When you boot, you can check if System Restore is disabled. Here's how:
- Press Windows key + R.
- In the Run dialog box, type control system and press Enter to open the Control Panel section.
- On the left side of the screen, click System Protection to open System Properties.
- In the Partition Protection Options section, check to see if protection is turned On under the drive you use for your files and folders.
- If the option is disabled, select the drive for which you want to enable System Restore and click the Configure button.
- The System Protection settings for Windows 10 will open, so check the Restore settings checkbox for the Turn on system protection switch. Make sure this option is selected.
- Click OK.
Now you can try running System Restore and see if the "You must turn on system protection" message appears on this drive.
Recommendations for system protection and recovery
The main recommendation is not to disable system protection. I devoted a separate section of the article to this issue, so I will not repeat it.
Do not specify the bare minimum amount of disk space for system recovery. This will limit your ability to restore previous versions of files and reduce the time frame for restoring the system to a checkpoint.
If you don't have a Windows installation disc, be sure to create a system repair disc. This should be done even though you can boot into Windows RE from your hard drive. If the service partition with Windows RE becomes damaged, you can boot from the recovery disk and return the system to the point created before the problem occurred.
Create restore points manually before changing system files or cleaning the registry. When a problem arises after cleaning the registry, users, as a rule, are unable to fix it on their own. Creating a restore point takes a couple of minutes, and returning to it will allow you to easily fix the problem without outside help.
How to enable (disable) system restore in Windows 7? Create a restore point
Hello dear visitors! I will now write about how to enable system recovery in Windows 7 . I’ll also write how to disable it and how to manually create a restore point . And in the next article I will write how to restore the system, or in other words, how to roll back to earlier settings.
But first, a few words about what system recovery is. This is a function that allows you to create so-called restore points. If system recovery is enabled, then automatically before installing any drivers or programs, as well as after a certain period of time, a copy of important system files and settings is created. You can also create a restore point manually; I will write in more detail how to do this.
What is all this for? In fact, this is a very useful feature. If there is any problem with loading your computer, you can perform a system rollback. That is, restore system files and settings from a restore point that was created, for example, a few days ago, when the computer was still working perfectly. Such a thing will, of course, not save you from all problems with your computer, but it can easily save you time and even money. Therefore, I advise you to enable system restore and, if necessary, make restore points manually.
How to enable system restore?
Let's check, most likely you already have everything included.
Right-click on “My Computer” and select “Properties”. On the right, click “Advanced system settings” and in the window that appears, go to the “System Protection” tab.
If where the protection settings are, it says “Enabled” next to at least one local disk, then it means that system recovery is enabled and restore points are being created. You can skip this point.
: How to check your hard drive for errors?
Well, if you have “Disabled” written everywhere, then system recovery needs to be enabled.
To do this, select one of the local drives and click the “Configure” button. You can choose the partition where you have the most memory, this is not very important.
A window will open in which you need to select the option “Restore system settings and previous versions of files.” Then use the slider below to set the maximum amount of disk space that you are willing to allocate for creating recovery points. When new restore points are created, the old ones will be deleted.
Click “Apply”. You'll see that System Restore is enabled, which means that if you have a problem with your computer, you can try to restore Windows 7 even if it won't boot.
How to disable system restore?
If for some reason you want to disable System Restore, you can do this very simply.
Select the local disk on which recovery is enabled and click “Configure”.
A window will open in which check the box next to “Disable system protection” and click “Apply”.
A warning will appear, click “Yes”.
That's it, system restore is disabled.