Disable unnecessary processes
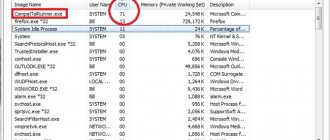
Running processes occupy the physical memory of the computer and can affect the operation of other tasks, even if they are not running on the PC. Unnecessary processes can be disabled in the Windows Task Manager.
Step 1. Press the “Ctrl” + “Shift” + “Esc” keys simultaneously.
Press the “Ctrl” + “Shift” + “Esc” keys simultaneously
Step 2. In the window that opens, go to the “Processes” tab and check the “Display processes of all users” checkbox. The “Image name” column displays the names of the processes, and the “User” column shows on whose behalf (system or user) it was launched.
Go to the “Processes” tab and check the “Display processes of all users” checkbox
List of processes required by the operating system:
List of processes
Note! You can try to disable any other processes in the system experimentally.
Step 3. To end (disable) a process, click on its name and click the “End Process” button. In the next window, click “End Process” again.
Click “End process”
If an attempt is made to close a process important to the system, it will soon start again, or the system will deny access to closing it.
How to disable a service in Windows
To begin with, it should be noted that all the actions that will be given below cannot guarantee a significant increase in performance, since this factor is influenced by a huge number of other nuances, including support for “cleanliness” on the part of the user himself
It is also necessary to understand that the word “disabling” in the context of this article does not imply deactivation of services, but only a transition from automatic to manual startup mode, since in the future there may be situations when their functionality may be required.
The described actions imply interference with the normal operation of the operating system, which under certain circumstances can lead to some errors in the operation of the computer. Therefore, before taking action, it is worth creating a recovery point that will allow you to avoid negative consequences.
General points have been discussed, the preparatory stage is completed. And the order of actions is as follows:
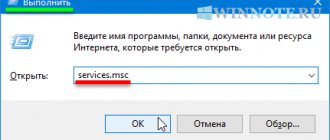
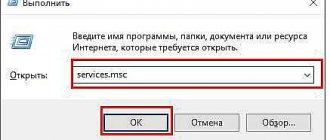
- Press the key combination “WIN+R” and enter the command “services.msc”;
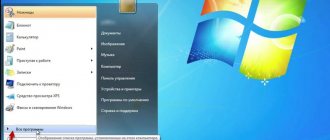
- Or open “Start” - “System Tools” - “Control Panel” and go to the “System and Security” - “Administration” section;
- Select the desired service in the list and right-click to open the context menu and select “Properties”;
- In the window that opens, pay attention to the line “Startup type” and switch the parameter to “Manual” mode; if necessary, first click on the “Stop” button;
- Save your changes and close the window.
In fact, that's all. Finally, all that remains is to restart the computer and check the stability of the computer.
Disable unnecessary services
Services you can disable
Closing processes does not always allow you to get rid of them completely. Unneeded Windows services that run processes can be disabled using the System Services snap-in.
Services that can be disabled:
Step 1. Press the Win and R keys together (Win is to the left of Alt).
Press the Win and R keys together
Step 2: Type “services.msc” in the window and click “OK.”
Type “services.msc” in the window and click “OK”
Step 3: The Services snap-in will open. Click on the desired service and click “Stop”.
Select a service to stop its process
The service will be stopped.
The service stops
Advice! It is not advisable to disable a service unless you are sure that this will not affect the operation of the system now or in the future.
Table of services that can be disabled
If you want to completely save yourself from future problems, then simply change the startup type instead of automatic and disabled - manual.
Then the launch will be carried out only when required. But keep in mind that in this case some services will be constantly running. Table of unnecessary services
| Name | Description |
| Adaptive brightness control | Responsible for automatic brightness control using a light sensor. |
| Windows Backup | Responsible for the function of creating a system image so that it can later be restored from it. There is an easier recovery method. For example, creating a restore point. |
| Disk Defragmenter | Built-in disk defragmenter. Required for Disk Management to function properly. I recommend defragmenting with a third-party program called Defraggler. |
| Print Manager | Stores a document in memory for printing later. |
| Performance Logs and Alerts | Stores and collects information about the computer. |
| Windows Defender | Built-in antivirus, very unreliable. It's better to replace it with something else. |
| Smart Card Removal Policy | Sets a block when the smart card is removed. |
| Windows Media Center Scheduler Service | Provides the ability to start and stop recording TV shows in this program. |
| Bluetooth support | Data transmission technology. |
| Diagnostic Policy Service | Conducts diagnostics and corrects some problems (very rarely useful). |
| Bitlocker Drive Encryption Service | Built-in program that allows you to put a password on a flash drive or disk. Present only in Windows 7 Professional and newer. |
| Smart card | Provides support for smart cards. |
| Themes | Responsible for the use of themes. |
| Fax | Technology for transmitting text and images over the telephone network. |
| Windows Update | Downloads various updates to your computer and installs them. There are many spyware updates so users often turn them off in Windows. |
| Parental control | Allows you to configure limited access to the computer, as well as to its functions. |
| Windows Cardspace | Designed for authorization on different Internet resources without the need to re-enter data. It was canceled in 2011. |
| Remote registry | Provides the ability to remotely edit the registry. For safety reasons, it is better not to use. |
| Secondary login | Other users will be able to run processes. |
| Server | To create a local network. |
| Secure storage | Saves authorization data (similar to automatic filling of forms in browsers). For safety reasons, it is better not to enable it. |
| Remote Desktop Service | Provides the ability to connect to the desktop of other users remotely. |
| Portable Device Enumerator Service | Provides synchronization of music and images in applications when working with media. |
If you have doubts about the need for a service, then set the startup type to manual.
From the table, select those that you do not use. I've briefly described what each does. Many are started manually, but some run continuously. They are not responsible for any global changes in your system, you can safely turn them off (if you can always turn them back on).
Don't forget a few points:
- Disabling applies to all users of the computer.
- A reboot is required for the changes to take effect.
- Perhaps someday the services will be needed.
Some programs and applications create their own services (for example, for updates). In this case, you can either disable them or uninstall the programs associated with them.
Below are instructions on how to disable it for those who do not yet know how to do it.
Disable services and startup items
To prevent services from starting when Windows boots, you need to remove them, along with unnecessary program elements, in the system configurator.
Step 1. Press Win+R, type “msconfig” and click “OK”.
Press Win+R, type “msconfig” and click “OK”
Step 2: Click on the “Services” shortcut.
Click on the “Services” shortcut
Step 3. Check the “Do not display Microsoft services” checkbox at the bottom and click “Disable all”. Click "Apply".
Click “Disable all” and “Apply”
Step 4. Switch to the “Startup” tab. Click "Disable All" and click "OK".
In the “Startup” tab, click “Disable all” and “OK”
Step 5. About and select the appropriate way to exit the setting.
Oh and choose one of the exit options
Advice! It is not advisable to disable download elements unless you are sure that this will not affect the operation of programs that the user needs.
You can find out what the startup item belongs to by typing its name in an Internet search.
Enter the name of the element in the Internet search
Windows Services
Greetings, Friends! Internal services of Windows operating systems are responsible for the operation of drivers, applications and peripherals. A certain number of services are required for the normal operation of the system, but there are also services that are simply not needed for a particular computer configuration. For example, if you don’t have a printer, you can safely disable Print Spooler.
Third-party applications for the operation of components also create their own services. Today we will talk about how to disable unnecessary Windows services, thereby improving performance.
Each service has three modes: Automatic , Disabled and Manual . When we select “Disabled” , the service stops, in addition to its work, also the work of programs that depend on it. If we select “Automatically” , then the service starts when Windows boots (I wrote about booting here and here). If we select the item “Manually” , then the services are launched if necessary, when a process or program needs it.
But not all services that are enabled by default are needed for the system to function. You can do some analysis of these services and disable unnecessary ones.
In today's post I will show you two methods of analysis:
1. System Configuration utility . To launch it, click the Start button and in the “Search files and folders” field, enter msconfig then press Enter . In the window that opens, go to the “Services” . Yes, and I’ll add that some services cannot be disabled.
2. Services console . Click the Start menu and in the “Search files and folders” field enter the word “Services” , select “Component Services” .
In the left part of the window, select the “Services (local)” , after which a list of services will open.
Here, by analogy with the Task Manager, we see columns with various information for each service. Double-clicking on a service opens its properties window.
To stop the service, click the “Stop” . If you are completely sure that a particular service is not needed, in the “Startup Type” you can select the “Disabled” . If you are not sure about the need for a particular service, then select “Manual” .
To see services and change their startup mode, you can launch the Services .
Click Start and enter the word “Services” in the drop-down list, select “Services” .
We can see all service assignments on the “Advanced” . By double-clicking on a service, a properties window will open, in which we can perform actions to change the startup type.
Which services to disable or leave enabled depends on your needs, the hardware component of your computer (read configuration), as well as the software configuration.
And now I will name services that can be disabled by almost everyone:
1. Print Manager – disable it if there is no printer; 2. Application identity – disable if you do not use AppLocker, which identifies blocked applications; 3. Branch Cach – disable or set the startup type to “Manual” ; 4. Remote registry – disable; 5. BitLocker encryption services - disable.
Here are some services that you can disable if you have a broadband Internet connection and do not have network administration:
- Windows error logging service; - Remote Desktop Service; — Tablet PC input service; — system event notification service; — “Certificate Distribution” service; - Windows time service; - Task Scheduler; — “Parental Control” service; - Windows Media Player Network Sharing Service; - Windows search service; - Windows Media Center Scheduler Service; — Fax service; - Windows biometric service; — smart card service; - Windows Media Center set-top box service.
That's all I have for today. What services are you disabling? Let's share in the comments.
Clean operating system
Windows 7 has a set of cleaning tools that let you get rid of outdated and unwanted files that take up disk space and slow down your PC.
Step 1. Open “Computer” on the desktop by double-clicking on the corresponding icon.
Open the Computer shortcut
Step 2. Right-click on the system drive icon (usually C:) and select “Properties” with the left mouse button.
Right-click on the system disk icon (usually C) and select “Properties” with the left mouse button
Step 3. Select the “General” tab and click “Disk Cleanup”. Wait while Windows indexes the disk.
Select the “General” tab and click “Disk Cleanup”
Step 4. A list of files indicating their size will be displayed that can be erased without harm to the user and the system. Select the required items by placing an o next to them to delete.
Click “OK”
Step 5: Repeat this process for other PC hard drive letters.
Advice! It is advisable to use this cleaning product regularly to keep the system in good condition.
LiveInternetLiveInternet
Monday, September 30, 2013 09:33 + to quote book
It's no secret that Windows reserves a significant portion of a computer's resources for its own needs. Today we will talk about services, a significant part of which work in vain, that is, about how to dump unnecessary ballast. I recommend disabling them in Windows 7, since in most cases they are not needed; the test showed that the computer can work quite well without them.
List of services recommended to be disabled.
- Windows CardSpace
- Windows Search (loads your HDD)
- Offline files
- Network Access Protection Agent
- Adaptive brightness control
- Windows Backup
- IP Ancillary Service
- Secondary login
- Grouping of network participants
- Automatic Remote Access Connection Manager
- Print Manager (if there are no printers)
- Remote Access Connection Manager (if no VPN)
- Network Member Identity Manager
- Performance Logs and Alerts
- Windows Defender (if you have an antivirus, feel free to disable it)
- Secure storage
- Setting up a Remote Desktop Server
- Smart Card Removal Policy
- Software Shadow Copy Provider (Microsoft)
- Homegroup Listener
- Windows Event Collector
- Network login
- Tablet PC input service
- Windows Image Upload Service (WIA) (if you do not plan to connect a scanner or camera to your computer)
- Windows Media Center Scheduler Service
- Smart card
- Volume Shadow Copy
- Diagnostic system unit
- Diagnostic Service Node
- Fax
- Performance counter library host
- Security Center
- Windows Update (to prevent the key from leaving Windows)
For those who value system recovery service, I highly recommend
do not disable:
- volume shadow copy
— shadow copy software provider (Microsoft).
Otherwise, recovery and creation of checkpoints will not work.
How to disable services to optimize the system:
Start – Control Panel – Administrative Tools – Services
or
Start - in the search bar write: Services
We find the service in the list.
Next to each there is a description.
If it is running, click on the “Stop” button and select “Startup type” – “Disabled”.
We do this with all the services on the list above.
Minor optimizations like these can save valuable resources and help your computer run faster.
Series of messages “Computer”:
Part 1 - You should know about these keys Part 2 - A useful thing - you move the cursor and see the meaning of the keys on the keyboard... Part 24 - An American government laboratory admitted that over the past two years it has been successfully using the quantum Internet. Part 25 - Microsoft confirmed the release of Windows Blue in 2013 Part 26 - Optimizing Windows 7 - disabling unnecessary services Part 27 - Email is 42 years old! Part 28 - Animated screenshots Part 29 - My help for novice computer users
Cited 183 times Liked by 84 users
Like share
0
Like
- 84
I liked the post - 183
Quoted - 4
Saved
- 183
Add to quote book - 4
Save to links
Liked84
0
Uninstall programs using Windows
Your computer may contain many programs, files, folders, and web browser add-ons that take up space on your hard drive and slow down the operating system. They can be removed using standard Windows tools.
Step 1. Press Win+R, type “appwiz.cpl” and click “OK”.
Press Win+R, type “appwiz.cpl” and click “OK”
Step 2. In the “Remove or change a program” window, select the desired element with the mouse and click “Delete/Change”.
In the “Remove or change a program” window, select the desired item and click “Remove or Change”
Step 3. Follow the uninstaller prompts.
We act in accordance with the uninstaller prompts
Removal with special programs
In addition to standard Windows tools, there are special programs that allow you to remove the listed items more effectively.
Such programs include:
- CCleaner, which combines many Windows cleaning tools, incl. Registry cleaning and simple interface;
- Advanced System Care, which has built-in components for searching for problems in the OS, removing viruses and spyware;
- iObit Uninstaller, which scans and removes data, folders and files left behind by programs, as well as web browser panels.
Uninstall using iObit Uninstaller
Step 1. Go to the website: https://ru.iobit.com/advanceduninstaller.php and click “Download”.
Go to the website and download the program
Note! Once downloaded, the file can be found by opening Settings and going to Downloads in your web browser.
Open the file in “Downloads”
Step 2. Run the installation file.
Run the installation file
Step 3: Click “Install”.
Click “Install”
Step 4. After installing and launching the program, go to “All Programs”, click on the one you want and click the “Uninstall” button at the bottom of the window.
Click the “Delete” button
Step 5. Click “Delete”.
Click “Delete”
Step 6. After removal, click “Power Scan”.
Click “Power Scan”
Step 7. A list of remaining program elements will appear. Click "Delete".
Click “Delete”
Step 8: A message will appear telling you to clean your system of residual files. Close the program by clicking on the cross at the top of the window.
Close the program
How to identify programs to remove
To quickly identify unnecessary programs, adware, spyware, viruses, toolbars and malicious applications, there is a special utility called Should I Remove It?
Step 1. Follow the link: https://download.cnet.com/Should-I-Remove-It/3000-18512_4-75834044.html?part=dl-&subj=dl&tag=button.
Step 2. Click the “Download Now” button.
Click the “Download” button
Step 3. Run the installation file and click “Next”.
Run the installation file and click “Next”
Step 4. Place a dot next to “I agree...” and click “Next”.
Place a dot next to “I agree...” and click “Next”
Step 5. Click “Next”.
Click “Next”
Step 6. Click “Next”.
Click “Next”
Step 7. Click “Install”.
Click “Install”
Step 8. Click “Finish” to complete the installation and launch the program.
Click “Finish”
A list of programs installed on the PC will appear. Each program has an indicator from green (useful) to red (useless, harmful), which shows the percentage of users who decide to remove it.
List of programs installed on the PC
Step 9. Click “Uninstall” next to the program you want to uninstall.
Click “Delete”
Step 10. Click “Yes” to confirm the removal of the program.
Click “Yes”
Click "Ok"
Step 11. After removing unnecessary programs, click the cross to close the utility.
Check for errors on hard drives
Errors on disks also reduce OS performance by making it difficult to read damaged data from them.
Step 1. Click on “Computer”.
Open the Computer shortcut
Step 2. Right-click on the system drive and left-click “Properties”.
Right-click on the system disk and select “Properties”
Step 3. Go to the “Tools” tab and click “Check now...”.
Go to the “Tools” tab and click “Check Now”
Step 4. Leave the “Automatically fix the errors...” checkbox and click “Start”.
Leave the “Automatically correct errors...” checkbox and click “Start”
You may receive a message stating that Windows is unable to check the disk because it is in use by the system. Click “Schedule...” and restart the PC, allowing it to complete the task.
Click “Check schedule...”
Managing Windows Services Using PowerShell
We are starting a series of translations dedicated to managing Windows services using PowerShell 2.0 and 3.0. This post will cover the following issues managing Windows services:
- Getting the service status on the local computer
- Getting the service status on a remote computer
- We filter services (for example, stopped services)
- Dependent Services
Let's denote the initial conditions: You are running Windows 7 and higher and you have administrator rights. All commands are recommended to be performed in a laboratory or virtual environment before being used in the field.
OBTAINING SERVICE STATUS
Let's start by simply getting the status of all services running on the local computer. Get-Service
cmdlet for this .
PS C:\> get-service
PowerShell is generally not case sensitive. The output is shown in the screenshot below.
Each line represents a service object. Each service object typically has its own properties. You can open them by simply passing these objects to another command, Get-Member
.
PS C:\> get-service |
get-member The results are shown in the screenshot below.
Typename parameter
from above says what kind of object is in front of us;
in this case it is System.ServiceProcess.ServiceController. The properties of the object are also circled in the screenshot. These are the attributes that describe that type of object. Although most of them are not used by default, you can use them if you know them. For example, we are only interested in seeing information about Windows Update. Through Get-Service
we will receive information only about some of its properties.
PS C:\> get-service wuauserv | select Displayname,Status,Can* DisplayName : Windows Update Status : Stopped CanPauseAndContinue : False CanShutdown : False CanStop : False How did I know I could print the service name? I looked using Get-Service. PS C:\>help get-service
You can get complete help information by typing:
PS C:\> help get-service –full
Information about a service can be obtained by its name or even the initial letters of the name.
PS C:\> get-service wi* Status Name DisplayName —— —- ———— Stopped WiaRpc Still Image Acquisition Events Running WinDefend Windows Defender Service Running WinHttpAutoProx... WinHTTP Web Proxy Auto-Discovery Se... Running Winmgmt Windows Management Instrumentation Running WinRM Windows Remote Management (WS-Manag...
Or if you prefer to work with display names, use the –Displayname
.
PS C:\> get-service -DisplayName "windows a*" Status Name DisplayName —— —- ———— Stopped AllUserInstallA… Windows All-User Install Agent Running AudioEndpointBu… Windows Audio Endpoint Builder Running Audiosrv Windows Audio I must
use the name parameter so that PowerShell treats the values as the display name rather than the actual service name. The command will look like this:
PS C:\> get-service "windows a*"
Parameter –Name
you don't have to print.
OBTAINING SERVICE STATUS ON REMOTE COMPUTERS
Previously, we were interested in obtaining information about the status of services on the local computer. However, services are managed on remote computers. If you look at the help on Get-Service
, then you can see that this cmdlet has the
–Computername
.
In this case, connections to remote computers are made without enabling the PowerShell remote control feature. If you can manage services using command line tools (sc.exe or the Service Manager management console), you can use PowerShell. Let's look at an example: PS C:\> get-service spooler -ComputerName novo8 Status Name DisplayName —— —- ———— Running spooler Print Spooler
Any command I demonstrated can be used to send to a remote computer. Even multiple computers, if you have the appropriate rights on the remote computer. If you're using PowerShell v3, you can easily select one service on multiple computers.
PS C:\> get-service wuauserv -ComputerName chi-dc01,chi-dc02,chi-dc03 Status Name DisplayName —— —- ———— Running wuauserv Windows Update Stopped wuauserv Windows Update Running wuauserv Windows Update
To make the presentation clearer, let's format the output.
PS C:\> get-service wuauserv -ComputerName chi-dc01,chi-dc02,chi-dc03 | format-table Name,Status,Machinename -autosize Name Status MachineName —- —— ———— wuauserv Running chi-dc03 wuauserv Stopped chi-dc02 wuauserv Running chi-dc01
Same result, but in PowerShell v2.
PS C:\> 'chi-dc01′,'chi-dc02','chi-dc03'| foreach {get-service wuauserv -computername $_} | Format-Table Name,Status,Machinename -AutoSize Name Status MachineName —- —— ———— wuauserv Running chi-dc01 wuauserv Stopped chi-dc02 wuauserv Running chi-dc03
WE CARRY OUT FILTERING (USING WHERE-OBJECT)
Services are filtered using the Where-Object
(where is short for cmdlet).
All we need from PowerShell in this case is to get only those services whose status is “stopped”. PS C:\> get-service |
where {$_.status -eq 'stopped'} PowerShell gets information about all services and passes them (using “|”) to the next command, which looks at each object. If the object's status property is “stopped”, it remains in the pipeline, otherwise it is excluded from it. At the end, the PowerShell expression displays those objects that are left in the pipeline. The results are shown below.
Now let's try to find one service on several machines. We will format the output into a table.
PS C:\> get-service -computername @('chi-dc01′,'chi-dc02′,'chi-dc03') | where {$_.name -eq 'wuauserv'} | format-table Name,Status,Machinename -autosize Name Status MachineName —- —— ———— wuauserv Running chi-dc02 wuauserv Running chi-dc01 wuauserv Running chi-dc03
We can even combine querying individual services with filtering them.
PS C:\> get-service "win*" -comp chi-dc03 | where {$_.status -eq 'running'} Status Name DisplayName —— —- ———— Running Winmgmt Windows Management Instrumentation Running WinRM Windows Remote Management (WS-Manag…
This command finds all services on the CHI-DC03 computer that start with 'WIN', but displays only those that are running. You can also group objects by status property.
PS C:\> $dc03 = get-service -computername chi-dc03 | Group-Object -Property Status
The $dc03 variable is a GroupInfo object.
PS C:\> $dc03 Count Name Group —— —- —— 64 Running {System.ServiceProcess.ServiceController, Sy... 79 Stopped {System.ServiceProcess.ServiceController, Sy...
Group property
is a collection of related services.
PS C:\> $dc03.Get(0).group
What is written above is easier to understand if you look at the screenshot.
As for me, I would prefer to use a hash table.
PS C:\> $hash = get-service -computername chi-dc03 | Group-Object -Property Status -AsHashTable PS C:\> $hash Name Value —- —— Running {System.ServiceProcess.ServiceController, Sys… Stopped {System.ServiceProcess.ServiceController, Sys…
Now each name represents a property in the hash table. If you have experience with PoweShell, you might be thinking about doing the following:
PS C:\> $hash.running.count
However, nothing will happen. Because the Status property is just an enumeration for the [System.ServiceProcess.ServiceControllerStatus] .NET class and properties like Running and Stopped are integers. PowerShell does the conversion to present it in a more visual form.
PS C:\> $hash = get-service -computername chi-dc03 | Group-Object -Property Status –AsHashTable –AsString
What the essence of the –AsString parameter is, in my opinion, is quite obvious. Now working with a hash table has become easier.
PS C:\> $hash.running.count 62 PS C:\> $hash.running[0..3] Status Name DisplayName —— —- ———— Running ADWS Active Directory Web Services Running AppHostSvc Application Host Helper Service Running BFE Base Filtering Engine Running BrokerInfrastru... Background Tasks Infrastructure Ser...
The next task on the agenda is checking server dependencies.
Required Services
PowerShell makes it easy to get the status of all the services that a given service requires, even on a remote computer.
PS C:\> get-service dns -ComputerName chi-dc03 –RequiredServices Status Name DisplayName —— —- ———— Running Afd Ancillary Function Driver for Winsock Running Tcpip TCP/IP Protocol Driver Running RpcSs Remote Procedure Call (RPC) Running NTDS Active Directory Domain Services
Parameter –RequiredServices
will pass an object into the pipeline for each required service.
You can even go further and check the required services for a given service to work. PS C:\> get-service dns -ComputerName chi-dc03 -RequiredServices |
select name,@{name="computername";expression={$_.machinename}} | get-service -RequiredServices Status Name DisplayName —— —- ———— Running RpcEptMapper RPC Endpoint Mapper Running DcomLaunch DCOM Server Process Launcher Parameter –Computername
Get-Service
cmdlet will take the output, but only for those objects that have a Computername property object - which is why I use a hash table with Select-Object. As we can see, there are no problems with the DNS service on the CHI-DC03 computer.
DEPENDENT SERVICES
We can do the same with dependent services. If there are none, nothing will be transferred to the pipeline.
PS C:\> get-service dns -ComputerName chi-dc03 -DependentServices PS C:\> get-service lanmanworkstation -ComputerName chi-dc03 -DependentServices Status Name DisplayName —— —- ———— Stopped SessionEnv Remote Desktop Configuration Running Netlogon Netlogon Running Dfs DFS Namespace Running Browser Computer Browser
Required and dependent services are also part of each service object.
PS C:\> get-service rpcss | Select *services RequiredServices DependentServices —————- —————— {RpcEptMapper, DcomLaunch} {WwanSvc, wuauserv, WSearch, wscsvc…}
In the meantime, you can get all the dependencies for all services, the following command
PS C:\> get-service –DependentServices
This won't give you particularly useful information, so I recommend querying specific services. The command works much better than PowerShell v3.
PS C:\> get-service dns -comp chi-dc01,chi-dc03 -RequiredServices | Sort Machinename,Name | Format-table -GroupBy machinename
The results are visible in the screenshot below.
To get similar results in PowerShell v2, you will have to pass computernames to Get-Service.
PS C:\> “chi-dc01″,”chi-dc03” | foreach { get-service dns -comp $_ -RequiredServices} | Sort Machinename,Name | format-table -GroupBy machinename
The next article will cover starting, stopping, and restarting services. End of translation.
Upd:
The post contains translations of articles from the portal 4sysops.com Managing Services the PowerShell way – Part 1 Managing Services the PowerShell way – Part 2
PS We would also like to share our free program for managing Windows services – NetWrix Service Monitor. The program monitors all automatically started services on a group of servers and, in the event of a sudden failure of one or more of them, sends notifications by email. The restart feature ensures that all controlled services are running without downtime. The program is easy to set up: install, enter computer names and indicate the desired email address.
Defragment hard drives
During operation, the disks become “fragmented”, because Some files, when overwritten, are scattered in fragments across the disk.
As a result, searching and launching files takes more and more time and the disk requires defragmentation.
Step 1. In the “Properties” window of the hard drive (see Steps 1-2 of the previous section), select the “Tools” tab and click “Defragment now...”.
Click “Defragment”
Step 2: Click “Defragment disk” to start the process. It may take quite a long time; during defragmentation, you can continue to use your PC.
Click “Defragment disk”
Step 3. Defragment all hard drive letters on the computer.
Reference! For solid-state hard drives, defragmentation is not required, because it does not affect the speed of their operation and reduces their resource.
Disable search indexing
Windows 7 indexes files on your hard drive to help you find and run them faster.
Disabling indexing can improve the speed of the OS if search in the system is not used very often and less than 2GB of RAM is installed on the PC.
Step 1. In the “Properties” window of the hard drive (see above), go to the “General” tab. Uncheck “Allow files indexed...” and click “OK”.
Uncheck “Allow indexing...” and click “OK”
Step 2. In the window that appears, click “OK” again.
Click “OK”
Step 3: Repeat these steps for all hard drive letters on the PC.
Optimizing Windows 7
The biggest irritation for users is the long loading time of the system itself, despite the fact that the system loads an order of magnitude faster than its predecessor Vista. You can speed up the system using a number of simple steps. Firstly, you can manually disable unnecessary system services, and secondly, you can use the msconfig utility to do this, the name of which can simply be typed in the menu bar.
Disabling unnecessary services that load automatically when Windows starts using msconfig
Type msconfig/ in the menu bar and click the “start” button. In the window that appears, select the “download” tab, where in turn you need to select “additional download options.” In the new window, check the boxes about, select the maximum number of cores of your computer in the drop-down menu, then click “OK” so that the selected settings are saved, and reboot the system.
The performance of Windows 7 should improve noticeably, and loading will certainly be an order of magnitude faster. It is important to understand that system boot also depends on how many processes and applications are launched by default on the computer during boot. Their number can be controlled using the same msconfig utility. The “startup” tab provides a complete list of applications that start simultaneously with the entire system booting. Many programs and applications are included in startup by default, virtually without the knowledge of users. When there are a lot of such programs and processes, the system itself and the loading process begin to slow down greatly.
Therefore, it is worth periodically analyzing the list of programs that start automatically and cleaning unnecessary ones. The ideal option is when only the antivirus program is automatically loaded.
Disabling pre-installed Windows services via services.msc
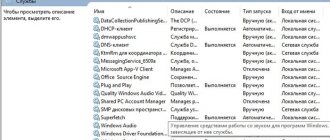
To do this, you need to type services.msc in the menu, a list of all services will appear in the window that appears. This list is very convenient for editing the operation of system components, since each service has descriptions of its purpose, and you can independently assess the need and rationality of disabling it. In order to see the description, just select the line with the desired service; the description will appear in the left column.
To disable a particular service, just left-click on the selected item, and then another window for the specific service will open. In order to disable it, you need to click the “stop” button, then change the startup type to “disabled” to prevent subsequent startups after the system is rebooted. Don't forget to click the "apply" and "ok" buttons. This service will no longer run on the selected computer.
IMPORTANT: you must select the services that you disable extremely carefully, since disabling an important process in the system can lead to a loss of its functionality, for example, some connected equipment may turn off or this or that application may stop working.
Disable unnecessary services through the Control Panel.
You can also access the page with active Windows services through the control panel. On the open control panel tab, select “all controls”, then “administration”. In the administration window that appears, look for the “services” line, double-clicking on it opens the window we need with a list of all system services.
Disabling unnecessary services via the command line
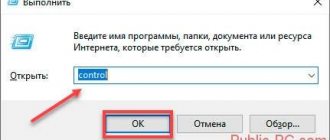
The required list of system components for editing can be found via the command line. You can open the command line by simultaneously pressing the Win key (it shows the Windows logo) and the letter “R” key. After these steps, the “Run” window will appear on the screen with an input line in which you need to type the “msconfig” command. Next, the “System Configuration” window will open, in which you need to find the “Services” tab.
List of services that can be safely disabled for Windows 7:
- Windows CardSpace
- Windows Search, which puts a strain on your hard drive,
- Offline Files - This service is responsible for implementing the API for offline files, most users simply do not need it,
- Network Access Protection Agent,
- IPSec Policy Agent - almost never used on home computers, you can safely disable it,
- Adaptive brightness adjustment - relevant only for owners of a computer or laptop with a built-in light sensor, which automatically adjusts the screen brightness relative to the environment; in other cases it can be disabled.
- IP auxiliary service - not used on home computers,
- Secondary login - necessary to run the system on behalf of other people; for security reasons, it is also better to disable this service,
- Automatic remote access connection manager
- Print manager - relevant if there are no printers connected to this device; if from time to time you still print documents, you can select the type of service launch “manually”.
- Remote access connection manager - relevant if VPN is not connected,
- Network Member Identity Manager,
- Windows Defender – You can safely disable it if you use other antivirus programs.
- Client for tracking changed links - the service is responsible for tracking links between files within the NTFS system; disabling it allows you to increase the efficiency of the system itself by an order of magnitude.
- SSDP detection is a service for detecting devices that operate using the SSDP protocol, including home appliances that have similar capabilities. This protocol is quite a vulnerable point in the device’s security system, so if it is not necessary, it is better to disable it.
- Smart card removal policy – you can safely disable it if you do not use smart cards.
- Tablet PC Input Service - This service is required for the pen and other similar tablet input devices to work, but in most cases it is not necessary.
- Windows Image Upload Service (WIA) - relevant if there is no scanner connected to the system or you do not connect a camera,
- Bluetooth support service - using the service is only relevant if you use appropriate devices; if Bluetooth technology is not used, you can safely disable the service itself.
- Windows Error Logging Service - this service generates a log of non-standard errors, system freezes and crashes; if you never analyze this information, the service can be disabled.
- Smart Card – This service is required if access control services running on a SIM card are used. In home computers, it is usually not used.
- Remote registry - makes it possible to make changes to the system remotely; for security reasons, it is worth disabling this system first.
- Fax – if you do not need to send fax messages, then you can safely disable this function,
- Parental Control - this service was transferred to Windows 7 from the previous version of Windows Vista; it is needed only so that these two systems work together; if you do not plan to work on Vista, then you can safely disable the service.
These are the services that, when disabled, the operating system continues to operate in full mode.
IMPORTANT: it is better to disable services gradually, 1-3 at a time, and then reboot the system to make sure everything works. Only then proceed to disabling the following services. Otherwise, it will be practically impossible to find out which of the disabled services is interfering with work.
Before the optimization process, you should take care to create a restore point so that you can restore the system to a working configuration at any time.
Check your meal plan settings
Windows 7 automatically adjusts your laptop's performance depending on whether it's running on AC power or on battery power.
If you only use your laptop plugged in, you can select the high-performance OS mode. You should also check this setting on your desktop PC.
Step 1: Press Win+R, type “powercfg.cpl” and click OK.
Press Win+R, type “powercfg.cpl” and click “OK”
Step 2. In the power options, click next to “High performance” to set the mode.
In Power Options, click next to "High Performance"
Disable Aero Mode
Additional OS performance can be obtained by adjusting visual effects. If Windows 7 is running very slowly, you can switch from Aero mode to a simpler look and feel.
Step 1. Right-click on an empty part of the PC screen and select “Personalization” with the left mouse button.
Launching “Personalization”
Step 2. Select “Windows 7 - simplified style” (Windows 7 Basic) or “Classic” from the list of available themes.
Select the available theme “Windows 7 - simplified style” from the list
Disable visual effects
Disabling visual effects also noticeably increases the speed of the OS.
Step 1: Right-click on the Computer icon and select Properties.
Right-click on the “Computer” icon and select “Properties”
Step 2. Click “Advanced system settings” on the left.
Click on “Advanced system settings”
Step 3. Click “Advanced”, and in the “Performance” section click “Settings”.
Click “Advanced”, and in the “Performance” section click “Settings”
Step 4. Click the “Visual Effects” tab, check the box next to “Adjust for best performance” and click “OK”.
Click the “Visual Effects” tab, put a dot next to “Ensure the best performance” and click “OK”
Reference! If the user does not like the appearance of the OS, in “Visual Effects” you can select another option that is suitable in a particular case.
Use ReadyBoost
ReadyBoost technology is one of the least known features of Windows, allowing you to use up to 8 USB drives to place temporary OS files on them, freeing up PC memory.
Step 1: Connect the USB drive to your PC and select “Speed up my system” when AutoPlay opens.
Connect the USB drive to the PC and select “Speed up my system”
- If AutoPlay doesn't work, open Computer.
Open the Computer shortcut - Right-click on the USB drive and select Properties.
Right-click on the USB drive and select “Properties”
Step 2. Click on the “ReadyBoost” tab, put a dot next to “Dedicate this device to ReadyBoost technology...” and click “OK”.
Click on the “ReadyBoost” tab, put a dot in front of “Provide a device for Readyboost technology...”
This will erase the contents of the USB drive and configure it to store Windows cache files.
ReadyBoost allows you to speed up Windows 7 startup and shutdown, and open more applications on weaker PCs. The disadvantage of this function is that the USB port is busy.
The optimization methods presented in the article allow you to increase the efficiency of using Windows 7 on various PCs.
Which Windows services can be switched to manual mode?
The Russian names of some services on this list may differ from those that you see on your computer. But this only applies to wording. If you cannot find the service you need by its exact name, look for options that are similar in meaning.
Windows 10
- Functionality for connected users and telemetry (Connected User Experiences and Telemetry).
- Diagnostic Policy Service.
- Diagnostic Tracking Service.
- Distributed Link Tracking Client - if the computer is not connected to any network.
- dmwappushsvc (WAP Push Routing Service).
- Downloaded Maps Manager - if you are not using the Maps application.
- IP Helper - If you are not using an IPv6 connection.
- Program Compatibility Assistant Service.
- Print Spooler - if you don't have a printer.
- Remote Registry - this service can be completely disabled.
- Secondary Logon.
- Security Center.
- NetBIOS support module over TCP/IP (TCP/IP NetBIOS Helper).
- Touch Keyboard and Handwriting Panel Service.
- Windows Defender Service - if you use a third-party antivirus or want to completely abandon protection.
- Windows Error Reporting Service.
- Windows Image Acquisition (WIA) - if you don't have a scanner.
- Windows Search - If you don't use Windows Search.
- Superfetch or SysMain - if Windows is installed on an SSD.
- Network logon (NetLogon) - if the computer is not connected to the corporate network.
- Parental Controls.
- BitLocker Drive Encryption Service.
- Fax.
- Xbox Live Network Service and other services with the word Xbox in the name - unless you play games.
Windows 8/8.1
- Computer Browser - if the computer is not connected to any network.
- Diagnostic Policy Service.
- Distributed Link Tracking Client - if the computer is not connected to any network.
- IP Helper - If you are not using an IPv6 connection.
- Offline Files.
- Program Compatibility Assistant Service.
- Portable Device Enumerator Service.
- Print Spooler - if you don't have a printer.
- Remote Registry - this service can be completely disabled.
- Secondary Logon.
- Security Center.
- Server - if the computer is not used as a server.
- NetBIOS support module over TCP/IP (TCP/IP NetBIOS Helper).
- Windows Error Reporting Service.
- Windows Image Acquisition (WIA) - if you don't have a scanner.
- Windows Search - If you don't use Windows Search.
Windows 7
- Computer Browser - if the computer is not connected to any network.
- Desktop Window Manager Session Manager - if you are not using the Aero theme.
- Diagnostic Policy Service.
- Distributed Link Tracking Client - if the computer is not connected to any network.
- IP Helper - If you are not using an IPv6 connection.
- Offline Files.
- Portable Device Enumerator Service.
- Print Spooler - if you don't have a printer.
- Protected Storage.
- Remote Registry - this service can be completely disabled.
- Secondary Logon.
- Security Center.
- Server - if the computer is not used as a server.
- Tablet PC Input Service.
- NetBIOS support module over TCP/IP (TCP/IP NetBIOS Helper).
- Themes - if you are using the classic Windows theme.
- Windows Error Reporting Service.
- Windows Media Center Service Launcher.
- Windows Search - If you don't use Windows Search.
Windows Vista
- Computer Browser - if the computer is not connected to any network.
- Desktop Window Manager Session Manager - if you are not using the Aero theme.
- Diagnostic Policy Service.
- Distributed Link Tracking Client - if the computer is not connected to any network.
- Indexing Service - if you don't use Windows Search.
- Offline Files.
- Portable Device Enumerator Service.
- Print Spooler - if you don't have a printer.
- ReadyBoost.
- Remote Registry - this service can be completely disabled.
- Secondary Logon.
- Security Center.
- Server - if the computer is not used as a server.
- System Restore service.
- Tablet PC Input Service.
- NetBIOS support module over TCP/IP (TCP/IP NetBIOS Helper).
- Themes - if you are using the classic Windows theme.
- Windows Error Reporting Service.
- Windows Media Center Service Launcher.
- Windows Search - If you don't use Windows Search.
Windows XP
- Alerter.
- Computer Browser - if the computer is not connected to any network.
- Distributed Link Tracking Client - if the computer is not connected to any network.
- Indexing Service - if you don't use Windows Search.
- Internet Firewall (ICF) / Internet Connection Sharing (ICS).
- Messenger service.
- Remote Registry - this service can be completely disabled.
- Secondary Logon.
- Server - if the computer is not used as a server.
- System Restore service.
- NetBIOS support module over TCP/IP (TCP/IP NetBIOS Helper).
- Uninterruptible Power Supply.
- Upload Manager.
- Wireless configuration (Wireless Zero Configuration).
This material was first published in January 2020. In June 2020, we updated the text.