Why do I use Yandex.Browser
Each web browser has its own advantages. Previously, I only opened websites through Google Chrome. It suited me completely until it started to slow down terribly on my old laptop. I had to look for an alternative.
Then I switched to Mozilla Firefox, which is also a pretty nice browser. I especially like the fact that you can have many tabs open without them shrinking into a thin strip. But a little time passed, and Firefox also began to slow down, and at some point produce errors every day. I quickly got tired of it, and I installed Yandex.Browser.
I had heard good reviews about him before, but was skeptical about them. Now I successfully use the program, it turned out to be much faster than Chrome and Firefox. A nice interface, a convenient menu, successful initial settings that almost did not have to be changed - all this is present in this web browser. Therefore, I can definitely recommend it, especially to owners of not very powerful PCs and laptops.
How to transfer Yandex browser to another computer?
There are 2 ways to transfer Yandex browser settings to another computer:
- Using automatic synchronization;
- Manually set the necessary parameters and export and import the section. This takes longer and does not allow you to transfer all the parameters; most of them have to be restored yourself.
We recommend transferring Yandex browser settings to another computer using the first method. We can use the second one as an alternative if one of the devices does not have Internet access.
Automatic transfer of Yandex browser data
Modern Yandex browser supports transferring the entire profile at one time. Thus, we can immediately transfer 9 different sections with settings.
What settings can be transferred to the Yandex browser via synchronization:
- Bookmarks;
- Sites added to the scoreboard and its design;
- Passwords;
- Extensions;
- Stories;
- Applications;
- Autofill data;
- Browser settings;
- Open tabs.
How to transfer Yandex browser to another computer:
- Go to the “Settings” section from the menu of the installed browser (the button is in the upper right corner).
- Click on the “Enable synchronization” button in the first “Synchronization” section.
- Log in to your Yandex profile and click “Enable synchronization.”
- On the “Settings” page, click “Show settings” and check that all items are active.
- We remove the browser from our PC.
- We install the Yandex web browser via an installation file from the official website on a new computer.
- We repeat steps from the first to the third steps on the new computer.
In order for the Yandex browser to be fully transferred to another computer, you will have to wait a little. It takes about a few minutes for browsers to fully synchronize.
How to manually export Yandex browser settings?
Exporting Yandex browser settings can only be partially done manually, namely, bookmark import is available. We can save all our favorites to a file, transfer it to another PC and load bookmarks from the file. With regard to other settings, this does not work today.
How to transfer favorites from Yandex browser to another PC:
- Go to the “Bookmarks” page.
- On the right side of the page, click on the “Actions” button and select “Export bookmarks to HTML file.”
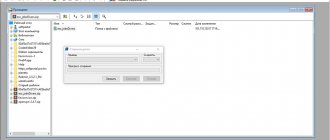
- Specify the path to save the file.
- We copy the HTML file and move it to another PC via a flash drive, another device or over the network.
- On the new PC, go to “Bookmarks” again and select “Import bookmarks from HTML file” in the “Actions” tab.
- All that remains is to indicate the path to the file on the flash drive or from another location, depending on the method of transferring it.
The remaining settings will have to be set manually. Changing the parameters is carried out in the same way as the first installation of these settings. Of course, it will take longer to manually tinker, so it is better to use automatic synchronization.
Transferring settings through Yandex servers is the easiest way to copy the browser state and move it to another web browser. The data is stored on the server for a long time, so we can restore the Yandex browser even several months after deleting the previous web browser. Maybe there is no need to transfer the entire browser? If the whole problem is a lack of disk space, it is better to simply change the location of the cache directory.
The browser cache is designed to speed up the loading of pages you visit. Fragments of sites are recorded in it, and when returning to them, there is no need to re-download large amounts of data, because they are already in the cache on the hard drive. Most browsers automatically manage the amount of this storage so as not to overload the system resource. This way, only as much memory will be allocated as the computer can afford.
To speed up the browser, it makes sense to transfer the cache to another disk.
But sometimes computers use not an HDD as a system drive, but an SSD, which, as you know, has a very limited write/rewrite resource. And while surfing, the browser constantly records information, replacing old information with new information when the allocated space is exhausted. In this case, it makes sense to move the browser cache to another disk or to random access memory (RAM disk).
Step-by-step instructions for free installation on your computer
To start the installation, open the website yandex.ru in your browser. Most likely, you will immediately see an offer to use the browser from Yandex.
Click on the “Install” button or on the inscription “Download browser”. After this, you will be taken to a page dedicated to this program, from where you can download it to your computer, smartphone or tablet. Click the “Download” button.
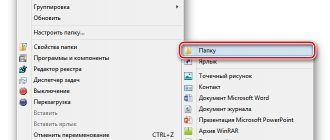
After this, the Yandex.exe installation file will be copied to your device. You can see it in the top or bottom line of the browser, as shown in the screenshot below, as well as in the “Downloads” folder or other directory that you have chosen for materials downloaded from the Internet. Find the Yandex Browser installer and open it.
In the window that appears, pay attention to 2 checkboxes that you can leave or remove. I usually agree to have the program send reports and hope that it actually helps improve its performance. Whether to make Yandex the default browser is up to you. If you leave the checkbox, links from other programs will open in this web browser. Make your choice and press the big yellow button.
We allow the application to make changes to the computer and wait until the installation process is completed.
Settings
When the browser is installed, it will immediately open and prompt you to go to the settings. You can take advantage of this offer or start using the program right away and customize it later. We'll get into it now and go through the basic parameters.
Initial Settings
First of all, the caring Yandex Browser offers us to transfer tabs from another web browser that we used previously. This is quite convenient and can save time. Click “Okay” if you agree with this step, and “Do not transfer” if you do not need it.
After this, the program can restart. Then we are asked to log in to our Yandex account. If you don't have one and don't plan on getting one yet, skip this step.
Otherwise, log into your account or click “Register” to create an email and use other company services. Then the system prompts us to install Yandex.Disk. You can also skip this step for now. We go to the start page or, as it is also called, the home page.
Important parameters
You can go to the browser menu and change settings at any time. To do this, click on the 3 bars at the very top of the screen on the right; all the main options are located here. Select “Settings” from the drop-down list.
Now scroll down the screen and change the necessary program parameters.
Each of us has our own priorities, but first of all I recommend going through the following options:
- Add users if you have several accounts or someone else uses the computer.
- Synchronize the system with one of your accounts in order to easily use various services and functions on all your devices, and also save information on the company server so that you don’t lose it if something happens.
- Determine where to download files. I usually ask the browser to specify each time in which folder a specific document should be saved. This suits me better than storing materials in loads.
Now switch to the “Passwords & Cards” tab and go to settings. If several people use the computer, you can set a master password to access important information.
I also advise you to carefully check the settings at this point. You can store passwords for different sites and use form autofill, but I don't recommend it. It is better to store your credentials in a notepad or special programs.
Additional settings
There are options that are not so important for work, but can significantly speed up, make it easier and more enjoyable. If you wish, you can:
- import, that is, copy all the necessary data from other web browsers installed on the computer;
- make the Yandex program the default browser if you plan to open all links with it;
- configure the search engine so that it shows hints and corrects errors when entering a query, and also speeds up page loading;
- change the appearance of the program by adding or removing panels and widgets;
- use a dark and light interface to make it more pleasant to work and less tired eyes;
- configure the voice assistant “Alice”;
- edit properties of tabs and smart bar;
- prohibit or allow the program to start when Windows boots; autorun is sometimes very convenient;
- apply form autofill, etc.
In fact, the browser provides quite a wide range of possibilities for adapting the functions and interface to suit your needs. I recommend that you try different options to create a comfortable working environment. Don't be afraid, you can always go to the menu and change or reset the settings if something doesn't suit you.
Also, sometimes the program offers to evaluate experimental functions. To do this, you need to switch to the beta version of your web browser. This activity is interesting, but not entirely safe, so be careful with such experiments.
New page appearance
To quickly access sites you use frequently, you don't have to bookmark them or keep tabs open. You can also customize the appearance of the start page. To do this, click on the plus sign at the very top of the screen next to the last open tab.
Here you can add the site to the quick access panel and change the background.
Transfer to RAM
As mentioned earlier, sometimes it makes sense to move the browser cache not just to another disk, but to a virtual RAM disk. You can create it using one of many special applications. Let's look at transferring a cache to a RAM disk using the RAM Disk program as an example:
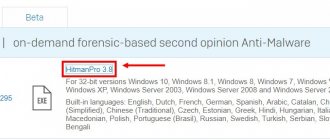
- Download and install the program from the official website: https://memory.dataram.com/products-and-services/software/ramdisk. The program is free for personal use.
- Launch from the Start menu.
- Select menu View, Advanced.
- In the Settings tab, select the desired RAM disk size. Check the boxes for Fat32 and Windows Boot Sector.
- Click Start.
- After creating the RAM disk, you need to determine the parameters for loading and saving it. Open the Load/Save tab.
- Check the boxes for both options. This means that before turning off the computer, an image of a virtual RAM disk will be created and written to the hard drive. And after switching on, it will be loaded back into RAM.
After completing these steps, you can transfer the cache from any browser to a RAM disk, similar to the instructions above. The important question here is how much space from your RAM you are willing to allocate for the cache. Agree, acting at random is inconvenient and unwise. After all, there are other programs on the computer that need RAM, and their performance should not be affected.
The Primo Ramdisk program solves this dilemma. It allows you to create a dynamic RAM disk. The point is that you only determine the maximum disk space, and the program itself decides how much can be given to the browser at the moment based on system indicators. The downside of the application is that it is paid.
Thus, the cache transfer algorithm is similar for all types of browsers. First, you copy the data folder to a new location. After this, you explain to the system and program that the path has changed. The same goes for transferring to a RAM disk. Just write the path to it in the settings. It is known that RAM is reset to zero after the computer is turned off. But in the case of virtual RAM, you can save the image during a power outage. Or don’t save, then your cache will be automatically cleared when you shut down. Leave your comments if you encountered difficulties changing cache data storage and how you managed to solve them.
Instructions for creating a dedicated area in RAM using the AMD Radeon™ RAMDisk utility and installing Google Chrome there to speed up the browser.
This method is even faster than an SSD, and it can be used together with an SSD to, as recommended, extend the life of the SSD drive.
Download and install AMD Radeon RAMDisk (4GB, Works with all system memory). We allocate how much RAM it’s not a pity, I installed almost 2GB, but 1GB will be enough, maximum 4GB. FAT32 Partition, Windows boot sector.
Start RAMDisk.
To save data when you turn off the PC and then load it again, on the Load/Save tab, check the appropriate boxes:
It goes without saying that we save this image on the HDD, since the RAM (and our RAMDisk) will be cleared when the PC is turned off.
After that we clicked Start RAMDisk, we got a new disk:
Now copy the folder with Google Chrome installed (C:Program FilesGoogle) to our RAMDisk (I have G:). It is advisable to first clear the browser cache or, as I did, reinstall Chrome cleanly.
So, here is our Chrome on RAMDisk:
We make a shortcut to chrome.exe on the desktop, in the properties of the shortcut in the Object field we add -user-data-dir=”G:User Data” . My entire line Object looks like this: G:GoogleChromeApplicationchrome.exe —user-data-dir=”G:User Data”
How to reinstall
To remove and install the program again without losing data, you need to perform the following sequence of actions:
- Go to the Windows “Options” menu.
- Open the “Applications” section.
- Find Yandex Browser.
- Click on it, then on the “Delete” button.
- We confirm our desire.
- Then select the “Delete” option.
- In the next dialog box, we do not put any marks, but simply press the button again to remove the program.
- When the process is completed, be sure to restart your computer.
Now follow the steps described at the beginning of this article and reinstall your web browser. When it starts, you will see that all data and tabs have been saved.
If you want the program to work “from scratch” after reinstallation without the changes and settings you have made, then in step 8, check the box next to the text about deleting all information.