06/08/2015 windows | for beginners | programs | files
This tutorial will go into detail on how to create an ISO image. On the agenda are free programs that allow you to create an ISO image of Windows, or any other bootable disk image. We will also talk about alternative options to accomplish this task. We'll also talk about how to make an ISO disk image from files.
Creating an ISO file, which is an image of some media, usually a disk with Windows or other software, is not a difficult task at all. As a rule, it is enough to have the necessary program with the necessary functionality. Fortunately, there are plenty of free programs for creating images. Therefore, we will limit ourselves to listing the most convenient of them. Moreover, first we will talk about those programs for creating ISOs that can be downloaded for free, then we will talk about more advanced paid solutions. See also: How to convert ESD to ISO.
Update 2020: Added two excellent and clean programs for creating disk images, as well as additional information on ImgBurn that may be important to the user.
Creating a disk image in Ashampoo Burning Studio Free
A free program for burning discs, as well as for working with their images, Ashampoo Burning Studio Free - in my opinion, is the best (most suitable) option for most users who need to make an ISO image from a disc or from files and folders. The tool works on Windows 7, 8 and Windows 10.
The advantages of this program over other similar utilities:
- It is free of additional unnecessary software and Adware. Unfortunately, with almost all the other programs listed in this review, this is not entirely true. For example, ImgBurn is very good software, but you won’t be able to find a clean installer on the official website.
- Burning Studio has a simple and intuitive interface in Russian: to perform almost any task you will not need any additional instructions.
In the main window of Ashampoo Burning Studio Free, you will see a list of available tasks on the right. If you select “Disk Image”, then you will see the following options (the same actions are available in the File - Disk Image menu):
- Burn image (writing an existing disk image to a disc).
- Create an image (taking an image from an existing CD, DVD or Blu-Ray disc).
- Create an image from files.
After selecting "Create an image from files" (I'll cover this option), you'll be asked to choose an image type - CUE/BIN, Ashampoo's native format, or a standard ISO image.
And finally, the main stage of creating an image is adding your folders and files. At the same time, you will clearly see on which disk and what size the resulting ISO can be written to.
As you can see, everything is elementary. And this is not all the functions of the program - you can also burn and copy discs, record music and DVD movies, and make data backups. You can download Ashampoo Burning Studio Free from the official website https://www.ashampoo.com/ru/rub/pin/7110/burning-software/Ashampoo-Burning-Studio-FREE
2) Creating an image from a protected disk
Such images are usually created from game discs. The fact is that many game manufacturers, protecting their products from pirates, make it so that you can’t play without the original disc... That is. To start the game, the disc must be inserted into the drive. If you don't have a real disk, then you won't run the game...
Now imagine a situation: several people are working at a computer and each has their own favorite game. Disks are constantly rearranged and over time they wear out: scratches appear on them, reading speed deteriorates, and then they may no longer be readable at all. To do this, you can create an image and use it. Just to create such an image, you will need to enable some options (if you create a regular ISO image, then when you start the game, it will simply give an error that there is no real disk...).
Alcohol 120%
Official website: https://www.alcohol-soft.com/
1) As in the first part of the article, first of all, launch the option to create a disk image (in the menu on the left, first tab).
2) Then you need to select the disk drive and set the copy settings:
— skipping reading errors;
— improved sector scanning (ASS) factor 100;
— reading subchannel data from the current disk.
3) In this case, the image format will be MDS - the Alcohol 120% program will read the subchannel data of the disk into it, which will subsequently help launch a protected game without a real disk.
By the way, the size of the image during such copying will be larger than the actual disk space. For example, based on a game CD of 700 MB in size, an image of ~800 MB in size will be created.
Nero
Official website: https://www.nero.com/rus/
Nero is not just one program for burning discs, it is a whole range of programs for working with discs. With Nero you can: create any discs (audio and video, with documents, etc.), convert videos, create covers for discs, edit audio and video, etc.
Using NERO 2020 as an example, I’ll show you how an image is created in this program. By the way, for images it uses its own format: nrg (all popular programs for working with images read it).
1) Launch Nero Express and select the “Image, project…” section, then the “Copy disk” function.
2) In the settings window, pay attention to the following:
— on the left side of the window there is an arrow with additional settings — check the “Read subchannel data” checkbox;
— then select the drive from which the data will be read (in this case, the drive into which a real CD/DVD disc is inserted);
- and the last thing you need to specify is the drive source. If you are copying a disc to an image, then you need to select Image Recorder.
Setting up copying of a protected disc in Nero Express.
3) When you start copying, Nero will prompt you to select a location to save the image, as well as its type: ISO or NRG (for protected disks, select the NRG format).
Nero Express - Select the image type.
CDBurnerXP
CDBurnerXP is another convenient free utility in Russian that allows you to burn discs and at the same time create their images, including in Windows XP (the program works in both Windows 7 and Windows 8.1). With good reason, this option is considered one of the best for creating ISO images.
Creating an image takes place in a few simple steps:
- In the main program window, select “Data disk. Create ISO images, burn data discs" (If you need to create an ISO from a disc, select "Copy disc").
- In the next window, select the files and folders that you want to place in the ISO image, drag and drop them into the empty area at the bottom right.
- From the menu, select “File” - “Save project as ISO image”.
As a result, a disk image containing the data you selected will be prepared and saved.
You can download CDBurnerXP from the official website https://cdburnerxp.se/ru/download, but be careful: to download the clean version without Adware, click “More download options”, and then select either the portable version of the program that works without installation, or the second installer option without OpenCandy.
ImgBurn is a free program for creating and burning ISO images.
Attention (added in 2015): despite the fact that ImgBurn remains an excellent program, I could not find an installer that was free of unwanted programs on the official website. As a result of scanning in Windows 10, I did not find any suspicious activity, but I recommend being careful.
The next program we'll look at is ImgBurn. You can download it for free on the developer’s website www.imgburn.com. The program is very functional, yet easy to use and will be understandable to any beginner. Moreover, Microsoft support recommends using this program to create a boot disk for Windows 7. By default, the program loads in English, but you can also download a Russian language file on the official website, and then copy the unpacked archive to the Language folder in the folder with the ImgBurn program.
What ImgBurn can do:
- Create an ISO image from a disk. In particular, you cannot use it to create a bootable ISO of Windows from the operating system distribution.
- Easily create ISO images from files. Those. You can specify any folder or folders and create an image with them.
- Burning ISO images to discs - for example, when you need to make a bootable disc in order to install Windows.
Creating an ISO Disc Image Using ImgBurn
The next program on our list is ImgBurn. Its interface is very clear, so you can figure out what and how without my help, but I’ll write everything down just in case. To begin with, I want to say that the installation file also contains the installation of unwanted software, therefore, when installing, keep an eye on all the checkboxes and items. Here is the official website from where you can download this program.
So, the ImgBurn utility is, of course, functional and has a simple interface. When you first install and launch the program, you will see the interface in English, but you can change it to Russian in the settings. True, to do this you need to first download the crack from the official website, and then put the file in the Language folder.
You don't need much to create a virtual image. You just need to click on one of the provided icons in the main program window, add the necessary files and save the image.
PowerISO - advanced bootable ISO creation and more
The PowerISO program, designed to work with boot images of Windows and other operating systems, as well as any other disk images, can be downloaded from the developer’s website https://www.poweriso.com/download.php. The program can do anything, although it is paid, and the free version has some limitations. However, let's consider the capabilities of PowerISO:
- Creating and burning ISO images. Creating bootable ISOs when there is no boot disk
- Creating bootable Windows flash drives
- Burn ISO images to disk, mount them in Windows
- Creating images from files and folders, from CDs, DVDs, Blu-Ray discs
- Converting images from ISO to BIN and from BIN to ISO
- Extracting files and folders from images
- Support for Apple OS X DMG images
- Full support for Windows 8
The process of creating an image in PowerISO
This is not all the features of the program and many of them can be used in the free version. So, if creating boot images, flash drives from ISOs and constantly working with them is your thing, take a closer look at this program, it can do a lot.
BurnAware Free - Burn and Create ISO
You can download the free program BurnAware Free from the official source https://www.burnaware.com/products.html. What can this program do? Not much, but essentially all the necessary functions are present in it:
- Writing data, images, files to disks
- Creating ISO Disc Images
Perhaps this is quite enough if you are not pursuing some very complex goals. Boot ISOs also burn perfectly provided you have a boot disk from which this image is made.
Deploying an image to physical media
And now about how to actually roll the image onto another disk. As before, you need to be guided by the fact that disks and partitions are presented in the form of files. And if to remove the image it was necessary to create a copy of the device file or partition, then in order to roll this image back you need to perform a copy operation in the opposite direction. That is, instead of cp /dev/sda2 win_c.img
write
cp win_c.img /dev/sda2
. Well, it’s better to remember the tips outlined in the image removal guide. Namely, use ddrescue and not use dd.
ddrescue --force win_c.img /dev/sda2 win_c_restore.img.log
Of course, we should remember that the partition into which we are restoring the image (in this case /dev/sda2) must be no smaller than the file with the image. If the partition turns out to be larger than this file, then there will be no problems during recovery, but there will be unallocated space in the partition. And you will either have to come to terms with this fact, or increase the size of the file system to the size of the partition using some specialized software (increasing, however, is usually much easier and faster than decreasing).
ISO recorder 3.1 - version for Windows 8 and Windows 7
Another free program that allows you to create ISOs from CDs or DVDs (creating ISOs from files and folders is not supported). You can download the program from the website of the author Alex Feinman https://alexfeinman.com/W7.htm
Program properties:
- Compatible with Windows 8 and Windows 7, x64 and x86
- Creating and burning images from/to CD/DVD discs, including creating bootable ISOs
After installing the program, in the context menu that appears when you right-click on the CD, the item “Create image from CD” will appear - just click it and follow the instructions. Writing an image to disk occurs in the same way - right-click on the ISO file, select “Write to disk”.
Free ISODisk program - full-fledged work with ISO images and virtual disks
The next program is ISODisk, which can be downloaded for free from https://www.isodisk.com/. This software allows you to perform the following tasks:
- Easily make ISOs from CDs or DVDs, including a bootable image of Windows or another operating system, computer recovery discs
- Mount the ISO on the system as a virtual disk.
Regarding ISODisk, it is worth noting that the program copes with the creation of images with a bang, but it is better not to use it for mounting virtual drives - the developers themselves admit that this function works fully adequately only in Windows XP.
Free DVD ISO Maker
Free DVD ISO Maker can be downloaded for free from https://www.minidvdsoft.com/dvdtoiso/download_free_dvd_iso_maker.html. The program is simple, convenient and no frills. The entire process of creating a disk image takes place in three steps:
- Run the program, in the Selet CD/DVD device field, specify the path to the disk from which you want to make an image. Click "Next"
- Specify where to save the ISO file
- Click "Convert" and wait for the program to finish.
Done, you can use the created image for your own purposes.
Hard drive cloning.
You purchased a new hard drive. What to do next? You can rearrange the system and all programs from scratch, then transfer the data to a new disk. But often there is simply no time or opportunity for this. Another option is to make a full copy of the disk.
We will consider two possible cases
- The original disk is fine.
- The original disk is not working well. It has bad blocks, it works slowly, poor SMART indicators
We copy a working hard drive.
There are many different programs designed to copy information disk-to-disk. For example, Acronis True Image, Paragon Drive Backup, Aomei Partition Assistant and many others.
We'll look at one of the oldest cloning programs, Symantec Ghost (formerly Nortn Ghost). To create a copy of a disk using Symantec Ghost, just boot your computer from the flash drive or CD on which the program is recorded and run the cloning wizard.
After starting the program, we need to choose what we are going to do. You can create an image of an entire disk, an image of a disk partition, burn from an image, or copy a disk to a disk. In this case, we need the latter. Select: Local -> Disk -> To Disk
Select the drive that we will copy. (Select local source drive by clicking on the drive number). In our case it is Kingston 120Gb.
Next, mark the drive to which we are copying (Select local destination drive by clicking on the drive number). Ours is Toshiba 1Tb.
Be careful! If you have several disks of the same size, to avoid errors, it is better to disable the extra ones. All information on this disk will be lost!
Click OK. If the new disk is larger than the old one, the program itself will proportionally increase the size of the partitions on the new one. You can change them if you wish.
Click OK again and check that we have the correct disks selected. Source – where we copy from, Destination – where we copy.
After that, click OK and the cloning process will start. The program displays how much time has passed since the start of the program and shows approximately how much time is left until the end. Copying time depends on the speed of the disk and the amount of information.
When finished, you must turn off the computer and disconnect the source disk. Otherwise, at the first start, a situation may arise when Windows loses the paths to the temporary file directories or the swap file and will not be able to boot.
We start from a new disk and make sure that everything works.
Copying a hard drive with reading problems.
Often the purchase of a new hard drive is due to obvious problems with the old one. Programs like Symantec Ghost do not always cope with such disks. Copying from Linux OS will help us out.
First, download a disk image, for example, Ubuntu 16.04.
https://releases.ubuntu.com/16.04.2/ubuntu-16.04.2-desktop-amd64.iso
Let's burn the image to a DVD or USB drive and boot from it.
Let’s switch to Russian for convenience and click on the “Launch Ubuntu” button
In 2-3 minutes the system will boot
Press the Windows icon key on your keyboard or click the Ubuntu icon in the upper left corner of the screen.
Let's launch the terminal.
We will copy the disk using the ddrescue program. Let's install it first.
To download ddrescue in the terminal, enter the following command:
sudo wget https://www.hamishmb.altervista.org/files/Downloads/ddrescue-gui/1.7.1/Trusty/ddrescue-gui_1.7.1~trusty-0ubuntu1~ppa1_all.deb
Let's start the installation:
sudo dpkg -i ddrescue-gui_1.7.1~trusty-0ubuntu1~ppa1_all.deb
Next, we need to find out the names of the disks that the operating system assigned to us:
sudo fdisk -l
sda is the failed disk that we will copy, sdb is the disk that we will copy to, sdc is the USB disk from which we booted.
ddrescue [options] infile outfile [mapfile] [options]
infile and outfile can be devices, sections, or files. mapfile is a regular file that must be located in an existing directory. If the file does not exist, the program will create it. Always use mapfile - this can save a lot of time, since without it ddrescue will not be able to continue a stopped, frozen, incompletely completed copy, but will only be able to start it again.
ddrescue -f -r 3 /dev/sda /dev/sdb ddrescue.log
-f or –force – forces ddrescue outfile disk . Required when a device is used as an outfile .
-rn or –retry-passes=n – sets the number of retries to read damaged areas, default is 0.
More detailed launch parameters can be viewed with the command ddrescue -h
Hard drive cloning.
Tags:ddrescue hdd recovery norton ghost symantec ghost
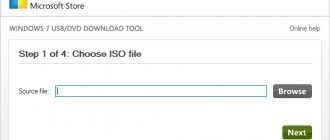
How to Create a Bootable Windows 7 ISO Using the Command Line
Let's finish with free programs and look at creating a bootable ISO image of Windows 7 (may work for Windows 8, not tested) using the command line.
- You will need all the files contained on the Windows 7 distribution disk, let's say they are located in the C:\Make-Windows7-ISO\ folder
- You will also need The Windows® Automated Installation Kit (AIK) for Windows® 7, a set of utilities from Microsoft, which can be downloaded from https://www.microsoft.com/en-us/download/details.aspx?id=5753. In this set we are interested in two tools - oscdimg.exe, located by default in the Program Files\Windows AIK\Tools\x86 folder and etfsboot.com - a boot sector that allows you to create a bootable ISO of Windows 7.
- Launch Command Prompt as administrator and enter the command:
- oscdimg -n -m -b»C:\Make-Windows7-ISO\boot\etfsboot.com» C:\Make-Windows7-ISO C:\Make-Windows7-ISO\Win7.iso
Note on the last command: the absence of a space between the –b parameter and the path to the boot sector is not an error, it is necessary.
After entering the command, you will observe the process of burning a bootable ISO of Windows 7. Upon completion, you will be told the size of the image file and written that the process is complete. Now you can use the created ISO image to create a bootable Windows 7 disk.
How to create an ISO image using UltraISO
UltraISO software is one of the most popular for all tasks related to disk images, flash drives or creating bootable media. Making an ISO image from files or a disk in UltraISO does not present any particular problems and we will look at this process.
- Launch the UltraISO program
- At the bottom, select the files that you want to add to the image, by right-clicking on them you can select “Add”.
- Once you've finished adding files, select "File" - "Save" from the UltraISO menu and save it as an ISO. The image is ready.
How to create ISO images from files using the ultra ISO program.
First, go to the developer’s website and download this program. The installation process is the usual: install and run.
The program has a paid license and you can try it for free. In trial use, the ultra ISO program is limited to 300 mV. The program has a function to convert an image for similar utilities, for example:
- CloneCD
- Nero (.NRG)
- It also fits .CUE and compressed ISO (.ISZ) formats
Creating an image from files and folders
If you decide to create an iso image, then you will need the files that you want to write to the image. In particular, these files are reinstallation disk or files for recording on a boot disk or startup disk
Open the utility. The program is divided into two windows. In the first top one it finds files prepared for recording, and in the bottom one there are files located on our computer.
To create an iso image, at the bottom of the program, open the files that we want to burn, select them all and click “add”.
Or you can also open the section on the computer where the files are located, select and drag them to the top window of the program.
In my case, I am creating an image for Windows 7.
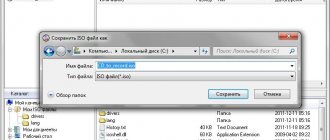
Next, go to the “file” tab and click “save as”. In this window, write the name of the image and select the iso type.
Using this program and simple steps, we created an image for further recording on a disk or flash drive.