Conclusion
RECOMMENDED: Click here to fix Windows errors and optimize system performance.
Have you always wanted two folders in two different places to sync in real time? Perhaps you have a folder on your desktop or laptop and want to sync it with another PC at home or with an external storage device such as a USB hard drive or NAS (network-attached storage device)?
There are many free programs that can help you sync two folders, but very few of them do a good job of syncing folders in real time. By real time I mean that the user does not have to open the program manually and start syncing or wait for the program to run regularly.
Why should I sync folders on Windows 10?
Your computer may contain important data in different folders, including financial documents, documents, videos, photos, music, etc. It would be a great loss if these files or folders are lost.
To prevent data loss, you can create a backup by copying and pasting your important folders to another location. However, traditional copy and paste is a lengthy process, especially for some large folders. In addition, some special folders may not be copied properly.
In this case, you can synchronize files or folders located in different locations. One of the most common situations is synchronizing data on an external hard drive. Of course, you can also sync files or folders to a cloud or network drive. In short, the goal is to protect data wherever you choose to store it.
Automatic updates.
Windows 10 downloads and installs updates automatically, and you can't turn them off.
And frankly, you shouldn't disable them—it's important for a modern operating system to be secure. But if for some reason you want your computer to stop automatically downloading and installing Windows 10 updates (so you can manually download and install updates on your own schedule), you can use a workaround - . If you own several Windows 10 devices, then this topic is relevant to you. Do you want to use one set of settings on all computers or do you prefer to create your own configuration for each PC?
In any case, Windows 10 offers standard ways to sync system settings between devices. You can sync your desktop wallpaper, browser settings, some passwords, language preferences, and many other settings.
Microsoft account
For synchronization to work, you must use the same Microsoft account on all devices. If you have not created a Microsoft account, you can do this in the system settings:
- Open the Settings app.
- Select the “Accounts” section.
- Select the “Your Data” tab.
- Click the “Sign in with a Microsoft account instead” link.
- Create an account and sign in.
It is important to keep in mind that this process changes the account type from local to Microsoft account.
Sync your settings
Make sure you're signed in to your account on your Windows 10 device. Then go to the Settings app > Accounts > Sync your settings
. By default, sync is turned on, but you can turn sync off completely by turning the Sync Options switch to the inactive position. In addition, you can disable synchronization of individual parameters. Let's take a closer look at what data each switch is responsible for synchronizing.
- The first option is called "Theme". A theme consists of a desktop image, an accent color, sounds, and a splash screen. The main idea is that instead of choosing individual wallpapers, colors, sounds and screensavers, you choose one theme that brings all these elements together. To view and apply a theme, go to the Settings app > Personalization > Themes. You can apply an existing theme built into Windows 10 or download other themes from the Microsoft website.
- The second option is called Internet Explorer Options and allows you to sync your favorites, browsing history and other content from the Microsoft browser.
- The Passwords setting is responsible for synchronizing credentials for some Windows 10 sites and apps.
- The Language Settings option allows you to sync your spelling dictionary and other language settings.
- The Accessibility option lets you sync your accessibility tools settings from the Accessibility section of the Settings app, including Narrator and Magnifier settings.
- The "Other Windows Settings" option sounds vague, but in fact it allows you to synchronize many settings, in particular the list of installed applications, the list of connected printers, the size and color of the mouse cursor, the location of the taskbar, etc.
Syncing not only ensures that all computers and tablets use the same settings, but is also a great way to back up your settings. If one of the devices fails, you can easily return the settings after restoration.
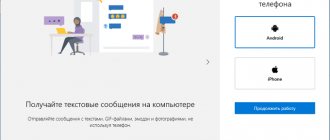
You can synchronize the contents of your Windows 10 system and your mobile device using a special Microsoft application. Would you like to listen to the same music, photos and documents on both your Windows 10 PC and your Apple or Android phone or tablet? You can do this with Microsoft Phone Companion. This Windows 10 app lets you perform a range of tasks, including copying photos from your phone or tablet to your desktop computer and signing up Cortana for your iPhone or Android device. Plus, you can use it to listen to the same songs on your computer and mobile device, and install the mobile version of Microsoft Office on your phone or tablet. The goal is to get your Windows 10 PC and your mobile device to talk to each other and allow you to access the same content in both environments.
First of all, connect your iPhone, iPad or Android device to your computer. On Windows 10, open the Windows App Store and search for the Microsoft Phone Companion app. Select the app from the search results list, download and launch it, as Figure 1 shows.
Phone Companion will automatically interact with your connected phone or tablet and tell you how much memory is in use and how much is unused. The app will also notify you that you can import photos and videos from your mobile device to your computer, as well as transfer other files using File Explorer (Figure 2).
Select the option to import photos and videos. A window will open on your screen displaying all the photos and videos on your phone or tablet. Now you can choose which files should be transferred to your computer, after which the selected photos and videos will be moved to the Windows Pictures folder. You can also enable the transfer of other files using File Explorer. The program will activate and point to your mobile device. You can then navigate through the subfolders on your device and select and copy any files you wish to move.
Click the link to hide the bottom half of the Phone Companion app. Now you can activate any of the remaining functions and install various applications on your smartphone. First, you'll need to make sure that when you access different Microsoft apps and services, you're using the same Microsoft Account on your computer and phone or tablet. Click the Get Started button and Cortana will install the voice assistant on your device. Confirm that you are using the same Microsoft Account on your computer and mobile device. Complete the required fields on the next two screens. Once the download is complete, register Cortana on your device (Screen 3).
| Screen 3: Register Cortana on your device |
Next, you can choose a setting that automatically copies photos taken with your mobile device to your computer. To do this, click the Get Started button and fill in the appropriate fields on the pop-up screens. After this, all photos or videos saved on your phone or tablet will be automatically sent to your OneDrive cloud storage cell and to the Windows Pictures folder.
Now let's get back to the Phone Companion app. Press the button that activates the third function and you can listen to songs recorded on any device. The application will prompt you to open File Explorer and copy the songs stored on your computer to your music folder in the OneDrive cloud storage. From there, you can access these entries using the Windows Groove application, as Figure 4 shows.
| Screen 4: Copying recordings from your computer to your music folder |
You can then enable a fourth feature that syncs OneNote content between the OneNote app on your computer and the mobile version of the app on your device. Activate option five on the Phone Companion screen to download Skype for your mobile device if it doesn't already have Skype installed (Screen 5).
Return to the Phone Companion screen. Activate the fifth feature and download Word, Excel, or PowerPoint packages for your device (Figure 6).
Finally, enable the latter feature and download the Outlook app for your mobile device, which will work with your mail, contacts, and calendar (Screen 7).
Now you can use all the mobile apps downloaded on your phone or tablet, and they will help you keep content on your computer and mobile device in sync.
Nowadays, you can fully use all the functions of a smartphone, without the need to physically connect the phone to a computer. But for some people it is still quite difficult. They are simply accustomed to connecting their phone to a PC to synchronize the necessary data.
Therefore, we will provide several ways in which you can transfer files from Android to Windows 10 and vice versa. With the Windows 10 OS update, this has become even easier than before. If you purchased a LENOVO S60 White smartphone on Android and want to synchronize your data with your desktop PC, this article is for you.
SyncToys
Download SyncToys from Microsoft Install and launch it. Click on the Create a new folder pair option.
SyncToys does not mark folders as a source or destination. This gives them much simpler names: left folder and right folder. Select the two folders you want to sync and remember which one is the left one and which one is the right one.
⇡#GoodSync
- Developer: Siber Systems
- Distribution: shareware
- Russian interface: yes
This utility is notable for the fact that it was created by the developers of the popular RoboForm password saving program. The application is well translated into Russian (amateur translations into other CIS languages are available), has a version for Windows and Mac, as well as a separate portable version for running from a flash drive. GoodSync is a shareware program and after thirty days of use it imposes restrictions on the number of files in a task (no more than one hundred) and the number of tasks itself (no more than three). However, the price is quite affordable: 595 rubles for the version for Windows and 795 rubles for the version for Mac.
GoodSync main window
Work in the program begins with adding tasks. They come in two types: synchronization and backup. Each task is displayed on a separate tab with its own settings. Regardless of what type of task you choose, you need to specify the left and right data folder. For both the source and destination paths, there are a large number of places available where files can be stored: your computer, other computers on the local network, FTP protocols, WebDAV, Amazon S3 cloud storage, Google Drive, Windows Azure, SkyDrive, connected devices on Windows Mobile, as well as its own GoodSync Connect service. The program has no restrictions on data exchange and allows you to compare all supported sources with each other. We should also talk about GoodSync Connect: it is a P2P network that allows you to synchronize data on several computers via the Internet. Thus, you do not need to connect computers to a local network or use a USB device for transfer, and the files will not be stored in the cloud. To use GoodSync Connect, you need to configure your computers by creating an account on the system.
Selecting a folder in GoodSync
By selecting the left and right folders, you can run a preliminary analysis or immediately begin synchronization. The main window will display a list of synchronized files in the form of a tree, indicating the size, date and copying direction (from left to right, from right to left). You can view individual categories of files (changed, new and others) and exclude or, conversely, enable their copying, as well as change the direction. In the task settings, you can specify parameters for its automatic execution: when a file is changed, when the program starts, periodically, when connecting folders, before logging out. It is possible to schedule a task using the standard Windows scheduler in login mode or without it. An interesting option is that you can specify the percentage of changes above which synchronization will not occur. Another feature that can be configured is the way conflicts are resolved automatically: skip, replace with later files, and so on. In addition to the parameters for automatically completing a task, the settings include other options where you can place many checkboxes next to items such as “Keep backup copies of deleted files” or “Copy file creation time,” apply a filter to certain files and folders, etc.
Job Options in GoodSync
The program can work in mini mode - it will be displayed as a small panel with a list of active tasks, which allows you to do other things and at the same time control the progress of synchronization. Finally, it is worth mentioning the GoodSync Explorer application, which is additionally installed on your computer - with its help you can view the directories in which your data is stored and add bookmarks to the desired places. These bookmarks can then be used when selecting a source for folders when setting up a job in GoodSync.
October 2020 Update:
Now we recommend using this tool for your error. Additionally, this tool fixes common computer errors, protects you from file loss, malware, hardware failures, and optimizes your computer for maximum performance. You can quickly fix problems with your PC and prevent other programs from appearing with this software:
- Step 1: (Windows 10, 8, 7, XP, Vista - Microsoft Gold Certified).
- Step 2: Click “ Start Scan ” to find Windows registry issues that may be causing problems with your PC.
- Step 3: Click " Fix All " to fix all problems.
You have three different syncing options: Sync, Echo and Contribute. When you select each of these options, you will see a description that will tell you how each sync works.
- During synchronization, all files and folders are synchronized between two folders. If you delete something in one of the two folders, it will also be deleted in the other folder.
- Echo copies all new and updated files from the folder on the left to the folder on the right. If you delete or rename a file in the left folder, it will also be deleted and/or renamed in the right folder.
- Add copies of new and updated files and folders from the left folder to the right folder. Files renamed in the left folder are also renamed in the right folder. No files or folders are deleted in any direction. For example, if you delete a file from the left folder, it will not be deleted from the right folder.
Finish pairing and click “Run” to sync files and folders.
⇡#SmartSync Pro
- Developer: SmartSync Software
- Distribution: shareware
- Russian interface: yes
This program has fewer functions than SyncBackPro, but is somewhat friendlier to use. It has a simpler and more pleasant interface, is well localized into Russian and costs 990 rubles (active support for Russian users is due to the fact that the head of SmartSync Software, Dmitry Sitnikov, is himself a programmer from Russia). The demo version of the application can be used for thirty days.
SmartSync Pro main window
As in SyncBackPro, the program's operation is based on the added profiles. New profiles are created using a wizard. First of all, you indicate what exactly you want to synchronize and the type of synchronization, and in the first step you are asked to select folders from the standard set: “Desktop”, “My Documents”, Microsoft Outlook and others. To independently specify the required directories, you should check the “Select directories manually” checkbox (the choice will be available in the next step). There are three types of synchronization available: synchronization with a local/network computer, with a remote computer via an FTP connection, or in batch mode. For each of them, different types of operation are provided: if a local connection is selected, the program can perform copying, moving, synchronizing, compressing files into a ZIP archive, or incremental backup (thus, the program can also be used for data backup). When connecting to a remote computer, both bidirectional synchronization and unilateral file transfer are available - from local to remote and vice versa.
SmartSync Pro Profile Wizard
If you chose to specify folders manually, then you will next need to check the boxes for the required directories on the local disk. You can view a list of all the files and folders included and, if necessary, adjust a filter to exclude specific items or files with certain extensions. Once you've finished setting up the source directory, you need to specify the destination directory to which the data will be synchronized (depending on the connection type, it can be located on a local drive or an FTP server). Next, you need to configure a schedule according to which the task associated with the profile will be executed. It can be launched manually, as well as at a certain interval - every few minutes, days, and so on, and you can enter a starting point and mark at what time you want to mute the profile. In addition, you can add a dependency on the execution of another profile (until that one starts, this one will not take effect) and specify a trigger for the following situations: login, logout, directory changes, and disk insertion. To complete the setup, you need to add a profile name.
Added profiles can be grouped into folders, launched one at a time, several or all at once. It is possible to send a shortcut to the desktop to launch a profile; import and export are also available. You can edit profile settings, and additional settings are available in the properties that are not available in the creation wizard: notifications when a profile is launched, events associated with the launch, a file replacement policy, saving multiple versions of files, and others. In your profile control panel, you can change your source directory and sync settings. Please note that the connection to a remote computer in batch mode is configured here: you can select a folder to save data on a removable/local disk, e-mail or FTP server. The settings of the program itself also have many interesting points: for example, it can work in the background even when the computer is locked or no one is logged in.
Profile properties in SmartSync Pro
Another detail related to the program: when installed on a computer, it adds the Backup with SmartSync Pro (make a backup) command to the context menu of files and folders, which opens the profile creation wizard with a selected directory. With its help, you can quickly configure the creation of a backup copy.
DSynchronize
Dsynchronize is free software written by a developer from Poland whose website seems to date back to the 1990s! But don't judge a book by its cover, because the programs he writes are excellent.
If you follow the link above, you will have to scroll down a bit to get to the program you want. At first I thought I was on the wrong site because I kept reading about his first program called Dspeech. Scroll down and past Dshutdown and you will see Dsynchronize.
As mentioned earlier, this is a pretty ugly site. Luckily, the software is clean and free of malware, malware, ads, etc. After downloading the ZIP file, extract all the files and run the request file.
Copy to iPhone
Synchronizing music, photos, movies and other video content requires mastering the iTunes program, which you can download. You can import music by opening the File
>
Add folder to media library
and add folder.
Individual files are also added from the menu by selecting File
>
Add File to Library
. After adding your music library to iTunes, follow these steps:
1. Connect your iPhone to your laptop using a Lightning cable.
2. Click Continue
when you see a request to connect your phone to provide access to the system.
3. Click on the phone icon in the top bar of iTunes.
4.Click the Synchronize
.
After this, the two devices - the computer and the phone will be synchronized. If this does not happen, go to the sidebar and turn on synchronization by checking the boxes next to Music, Movies, TV Shows and Photos. Click the Sync button again.
The synchronization process may take some time, depending on how much content needs to be synced.
Similarly, you can synchronize other content from your computer to your iPhone.
5. Pick up your iPhone and check your photos, music, apps, and videos to make sure you're receiving all the files from your Windows 10 computer.
Copy from iPhone
But copying from iPhone to Windows 10 computer is really not a simple operation. In an attempt to avoid piracy and illegal copying of content, Apple has made syncing a computer with an iPhone very difficult for ordinary users. Luckily, there are some workarounds, which we'll look at now.
- Music and films
. You can move iTunes media files to your phone from your computer, you can't send them from your phone to your computer. However, if you buy media from iTunes on your iPhone, you can get it to your desktop via the cloud. As long as you maintain one Apple ID, you will be able to download all your songs and movies again from iTunes on your computer at no additional cost.
- Photos
. To import photos from iPhone to Windows 10, I recommend using the OneDrive cloud service, the client of which is easily available in the Apple Store. - Files
. The cloud service is your best friend for file synchronization. You can use almost any cloud service for these purposes, the client of which can be found in the Apple Store. Although I personally use Dropbox, you can also use iCloud. I also recommend reading the article Best Runet cloud services for storing information if you don’t know which cloud service to choose.
The way to synchronize iPhone with Windows 10 is not that complicated, you just need to download and install the iTunes application on your computer with Windows 10, and then the application will do everything for you. But once you want to receive files from your iPhone to your Windows 10 computer, you feel sad. But cloud services will allow you to send any files from your iPhone to your Windows 10 computer.